I have been a full-stack developer for twelve years and am currently part of the Cloud FinOps team at Atlassian. I previously ran an App development agency, managing various teams across design and development, leading web, backend and native mobile app developers in Australia and Europe. My strengths are system architecture design and communicating complicated tech to everyday people. Having helped scale tech at numerous startups, I am passionate about making a positive difference. When not working, you can find me writing tech articles and teaching Javascript and React at SheCodes, an initiative helping to get more women into tech. I regularly give talks on various topics, focusing on the impact the technology we build can have. I am devastated by the state of the world, love a good political rant and can often be swearing at no one in particular. I enjoy building things in JavaScript, Deno and Node.
I love building APIs and Deno, a new JavaScript runtime, has me excited about making APIs that run on the edge network. Even if you don't have a use case for an API on the edge network, it's fun to play with new things. This blog will show you how easy Deno is to use and how quickly we can deploy an API on the edge network. We will use Deno to build an API that allows people to get photos of Bilbies and upload more images to add to the collection. If you have no idea what a Bilby is, don't worry; most people outside Australia won't. Bilbies are small marsupials – a bit like a rabbit mixed with a rat - and we usually use them instead of the easter bunny at easter time in Australia. Now back to the task at hand.
Installing Deno
The first thing to do is check if you have Deno installed on your machine. Open up a terminal, PowerShell, or whatever command line interface you use and type in the following command:
deno --version
If you haven’t yet installed Deno, the terminal should print out an error message telling you the command does not exist. If you already have Deno installed, skip to the next section about setting up Deno with VSCode.
zsh: command not found: deno
Ok, let’s install Deno. I am on a mac, so I can install it using the following command:
brew install deno
If you are not using a mac or not using Homebrew, here is a list of other install options.
Getting Deno to Work in VSCode
Now we have Deno installed; we can set up the base project. First, let’s create the project folder and index file. Open your command line interface and type in the following:
mkdir deploying-bilbies-on-the-edge

cd deploying-bilbies-on-the-edge/

touch index.ts
I will build this project using TypeScript. If you have not used TypeScript before, feel free to create .js files; however, the types are not that hard to understand in this tutorial, so I encourage you to follow along. Now open your new project file in your code editor (I recommend VSCode for this tutorial), and let’s write out the first few lines of TS in Deno.
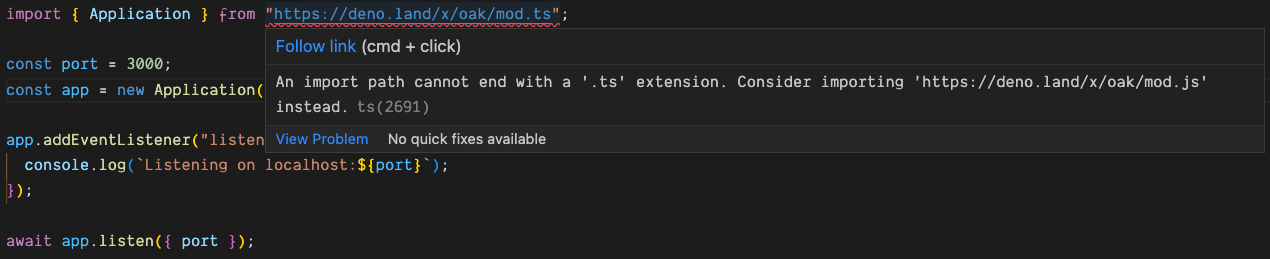
import { Application } from "https://deno.land/x/oak@v10.6.0/mod.ts";

const port = 3000;
const app = new Application();

app.addEventListener("listen", () => {
  console.log(`Listening on localhost:${port}`);
});

await app.listen({ port });
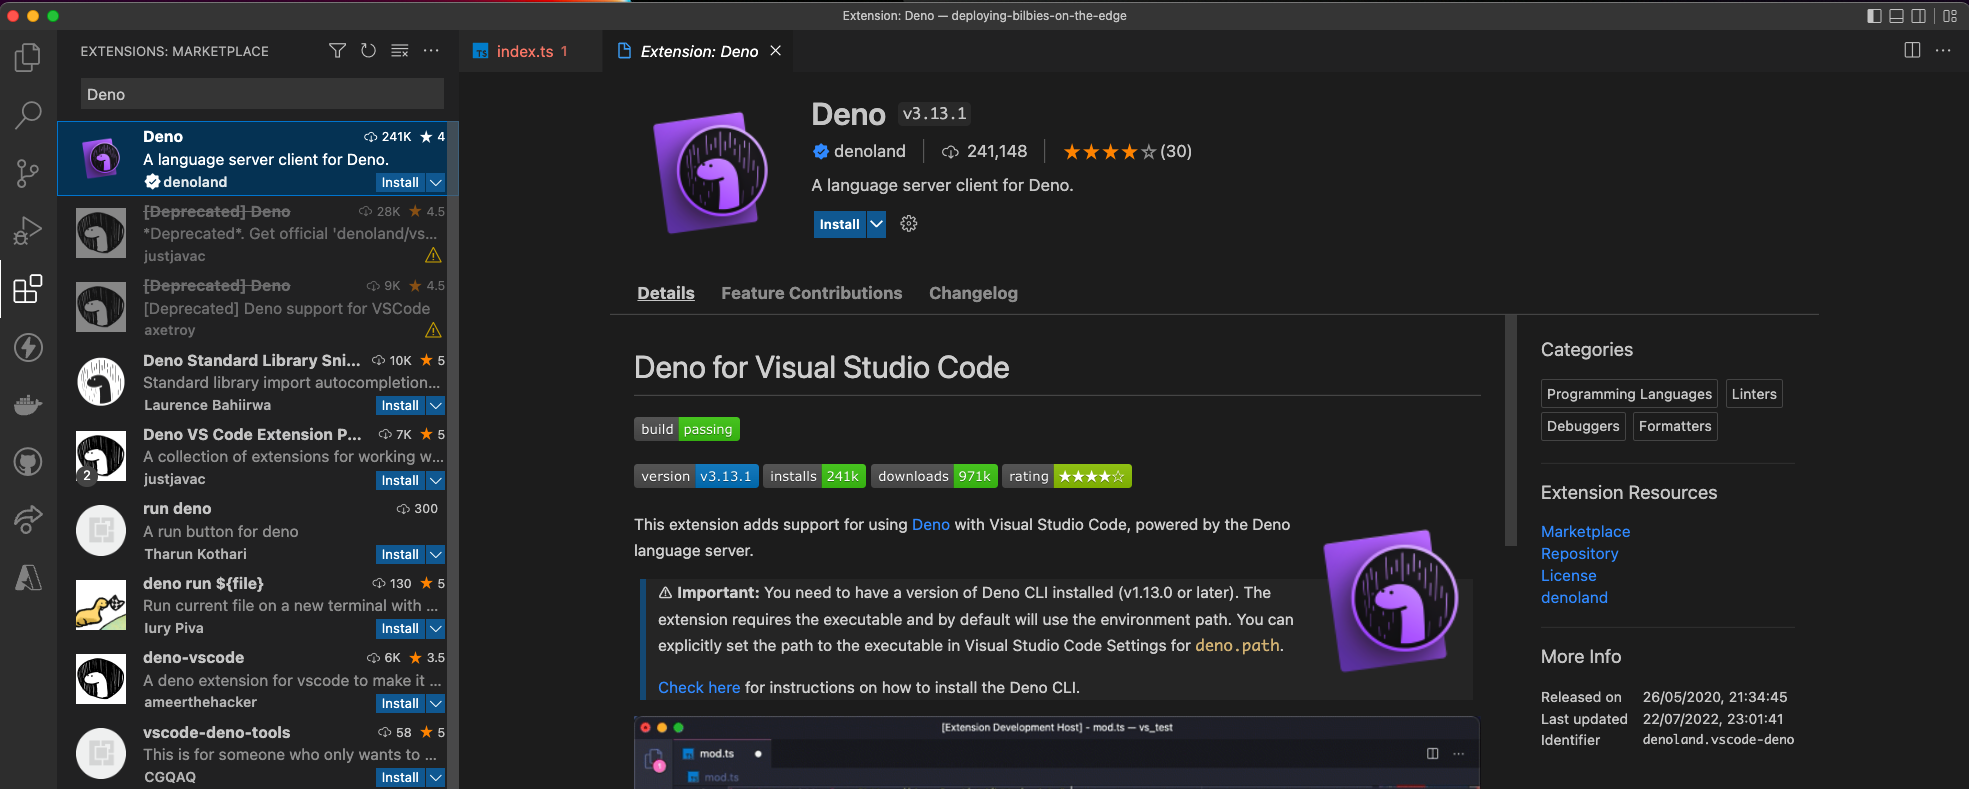
You may have noticed a red line under the import statement when you copied the above code into your index.ts file. We are going to need to install the Deno extension for VSCode.
Head to the extension section and install the following plugin:
Now add a folder called .vscode and inside create a settings.json file. Inside the JSON file, add the following:
{
  "deno.enable": true,
  "deno.lint": true
}
Your code editor is now set up and ready to go. Let’s move on to creating our first API route. One final pitfall to watch out for is that you need to open and close the code editor for the plugin to take effect after the first install. If there is still a red or yellow line under the import when you open back up, right-click to cache it locally, and it will go away. Deno does not install packages as Node does; it imports them via URL and caches them locally.
Setting up Oak
To get our API working, we need to create a new application using Oak (Oak is similar to an ExpressJS server) and add an event listener. Copy and paste in the following code:
// First, we import Oak’s app
import { Application } from "https://deno.land/x/oak@v10.6.0/mod.ts";

// Choose a port to run the server on
const port = 3000;
// Create a new instance of the application
const app = new Application();

// Now add an event listener to the app
app.addEventListener("listen", () => {
  console.log(`Listening on localhost:${port}`);
});

// Finally, tell the app to listen to the port we chose earlier. You will notice this is a top-level async function which is allowed in Deno
await app.listen({ port });
Let’s add a GET route for our images but get it to return a basic response for now. To do this, we will have to set up Routes inside our newly created app. Oak is middleware stacked in routes called one after another. We can set up a new API route like so:
// First, we need to import the Router
import { Application, Router } from "https://deno.land/x/oak@v10.6.0/mod.ts";

const port = 3000;
const app = new Application();

// Initialise a new router
const router = new Router();

// Add a GET route using the path `/bilbies`
router.get("/bilbies", (ctx) => {
  // Set the response to a JSON object with the following values
  ctx.response.body = JSON.stringify({
    v: 1,
    data: "An array of images",
  });
});

// Next, we need to register the router in the app and tell it to allow the following methods such as GET, POST, PUT, and DELETE that the router uses
app.use(router.routes());
app.use(router.allowedMethods());

app.addEventListener("listen", () => {
  console.log(`Listening on localhost:${port}`);
});

await app.listen({ port });
We now have a basic API that returns a JSON response for one GET request. Let’s deploy our new API to the edge.
Deploying to the Edge
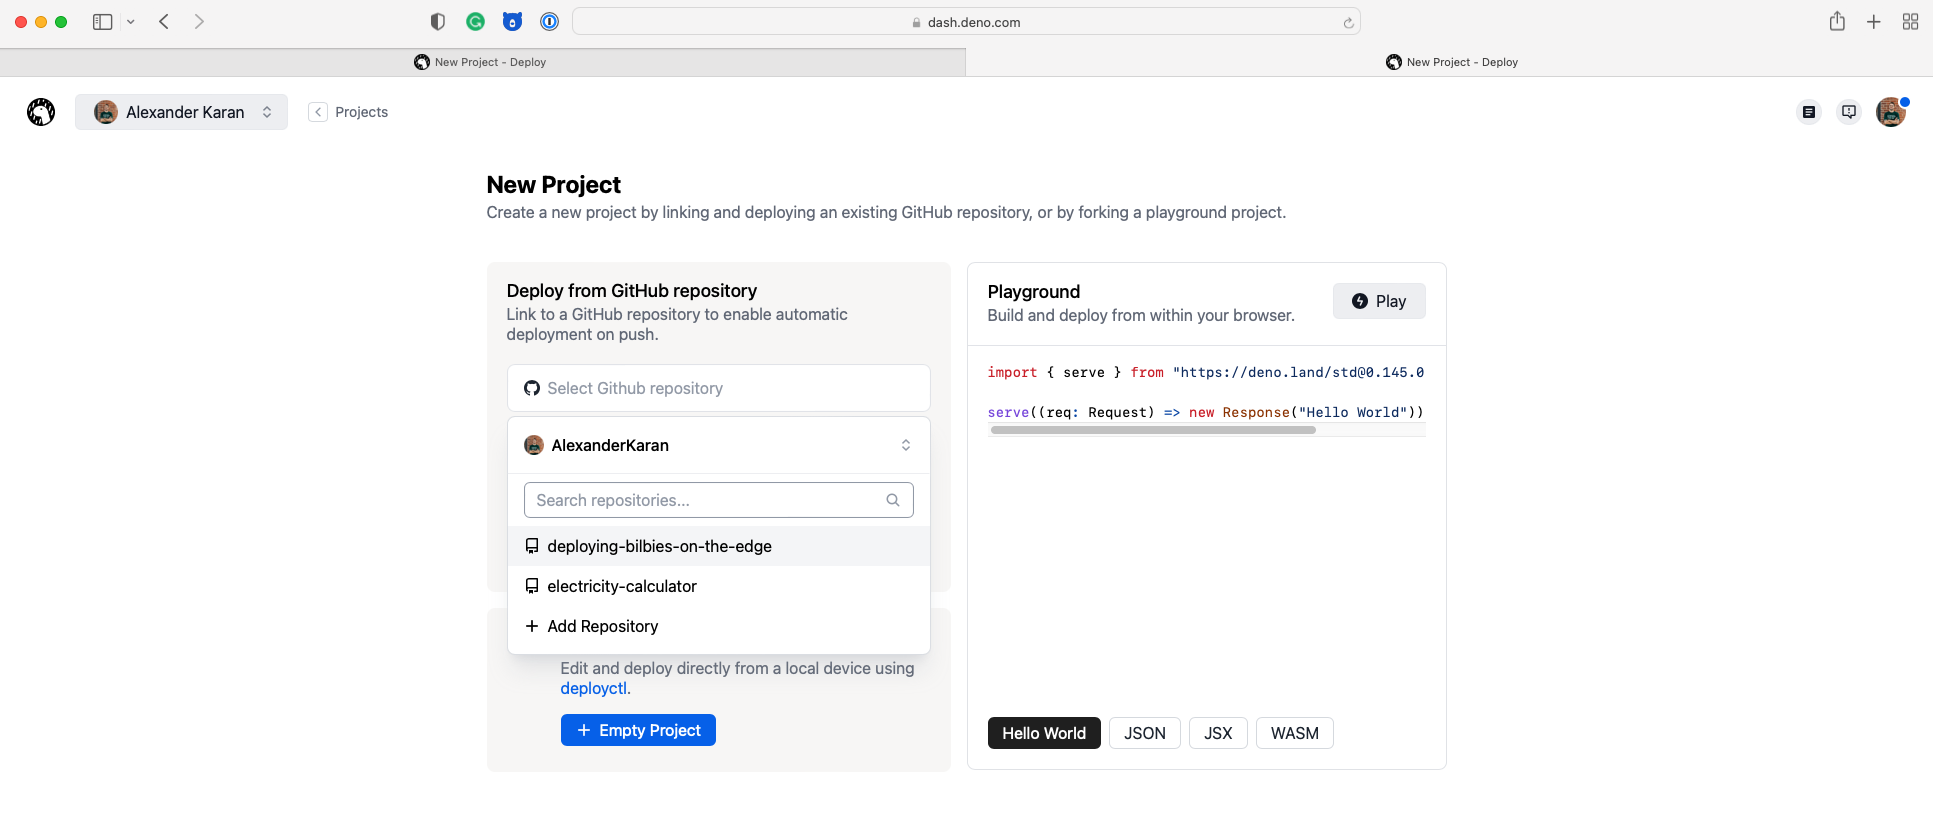
Deno has a fantastic Deno Deploy tool that automatically deploys your code to the edge network on every git commit. We were going to use this tool to deploy our code. Before we can start, set up a repository on Github and commit your code to the repo. Once your code is on Github, head to Deno Deploy and create an account. Once you have created an account, you should see a screen like this:
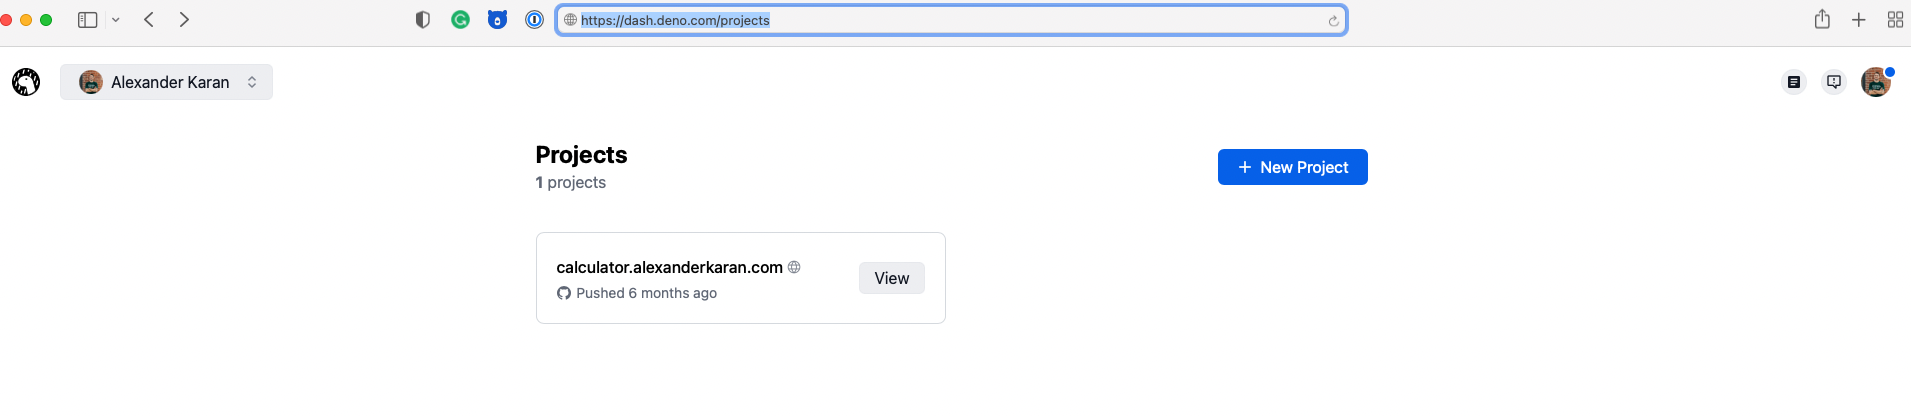
Select the option to create a new project and connect your new Github repository.
Select the index.ts file and then the option ‘automatic’ as we don’t need a build step. You can use Github actions to create a build step before deployment when you have more complex setups.
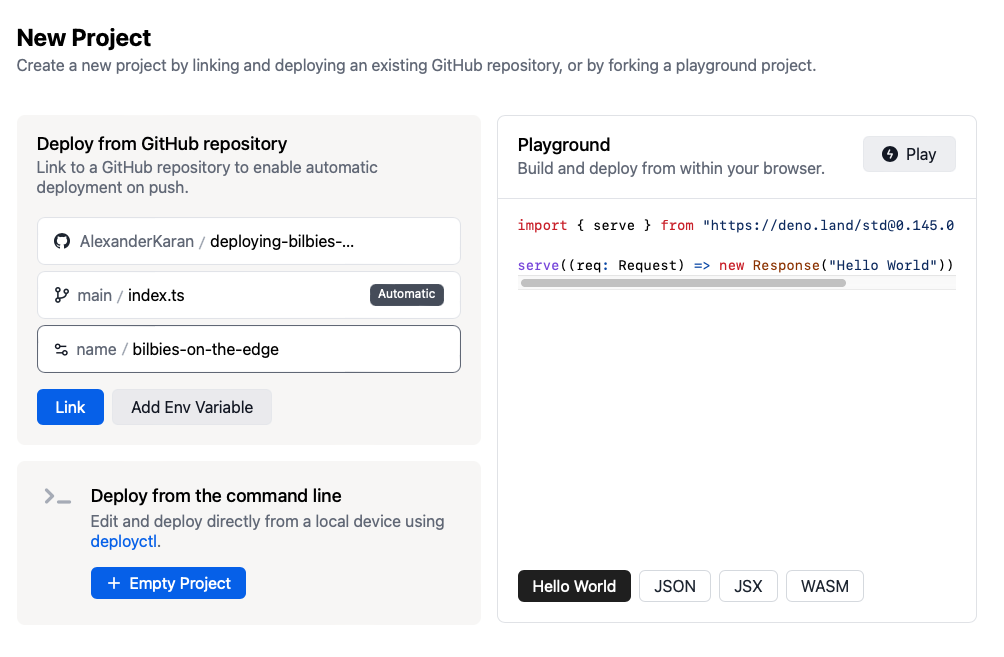
Click the button titled ‘link’. Once Deno Deploy finishes with your build, you should see the finished project and a URL for you to access the project.
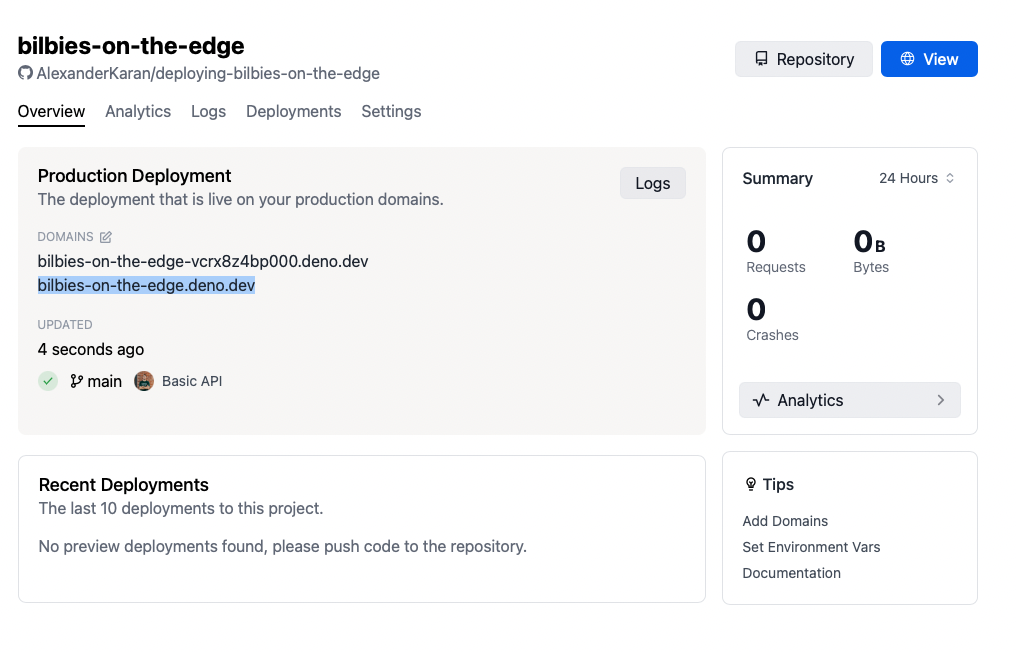
Copy one of the URLs and add /bilbies on the end and paste it into your browser. The full URL should look like this: bilbies-on-the-edge.deno.dev/bilbies. When pasted into your browser, you should see the following:

We now have our very basic API set up, but it doesn’t do much, so let’s get back to work on the API and update the GET route so it returns an array of image URLs.
Setting up a DB with Firebase
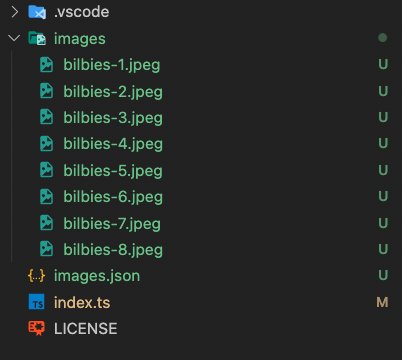
Before we set up a database and persistent storage, we will need some images of Bilbies. I have gathered a few images you can use and stored them inside the project on Github; you can find them in a folder called ‘Images’. Feel free to use images of your own.
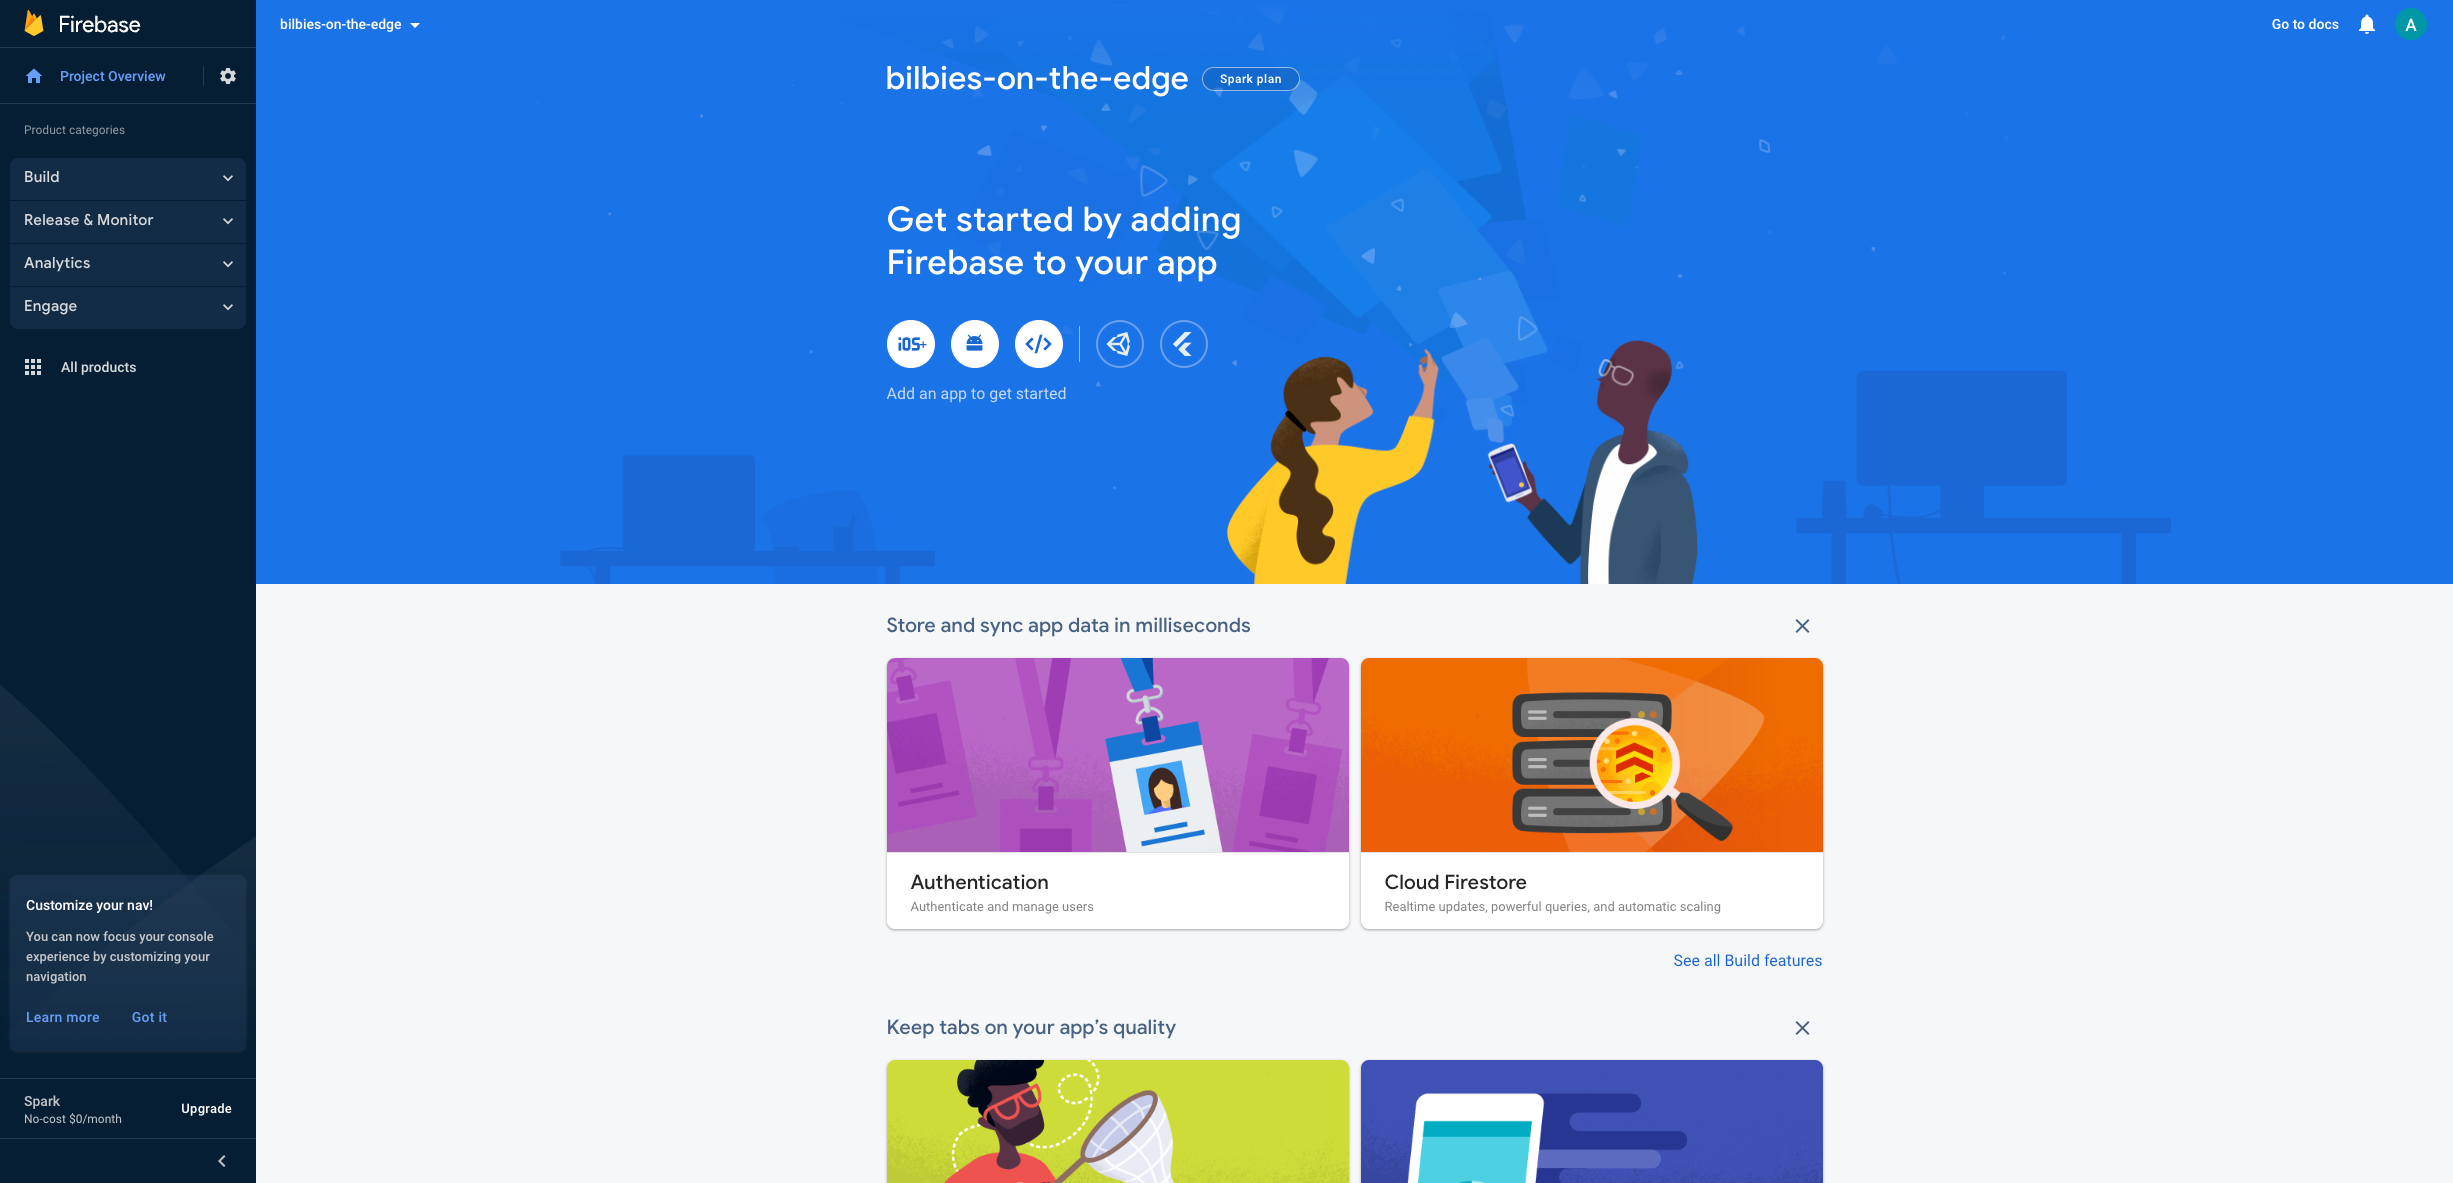
We will use Firebase to power the database and storage. Firebase has a service called storage for files and a great document-based (no SQL) database, which we will use. So head to Firebase and create an account if you do not have one already. Once you have set up your account, create a new project. I called my project bilbies-on-the-edge. Once done, you should see a screen like this:
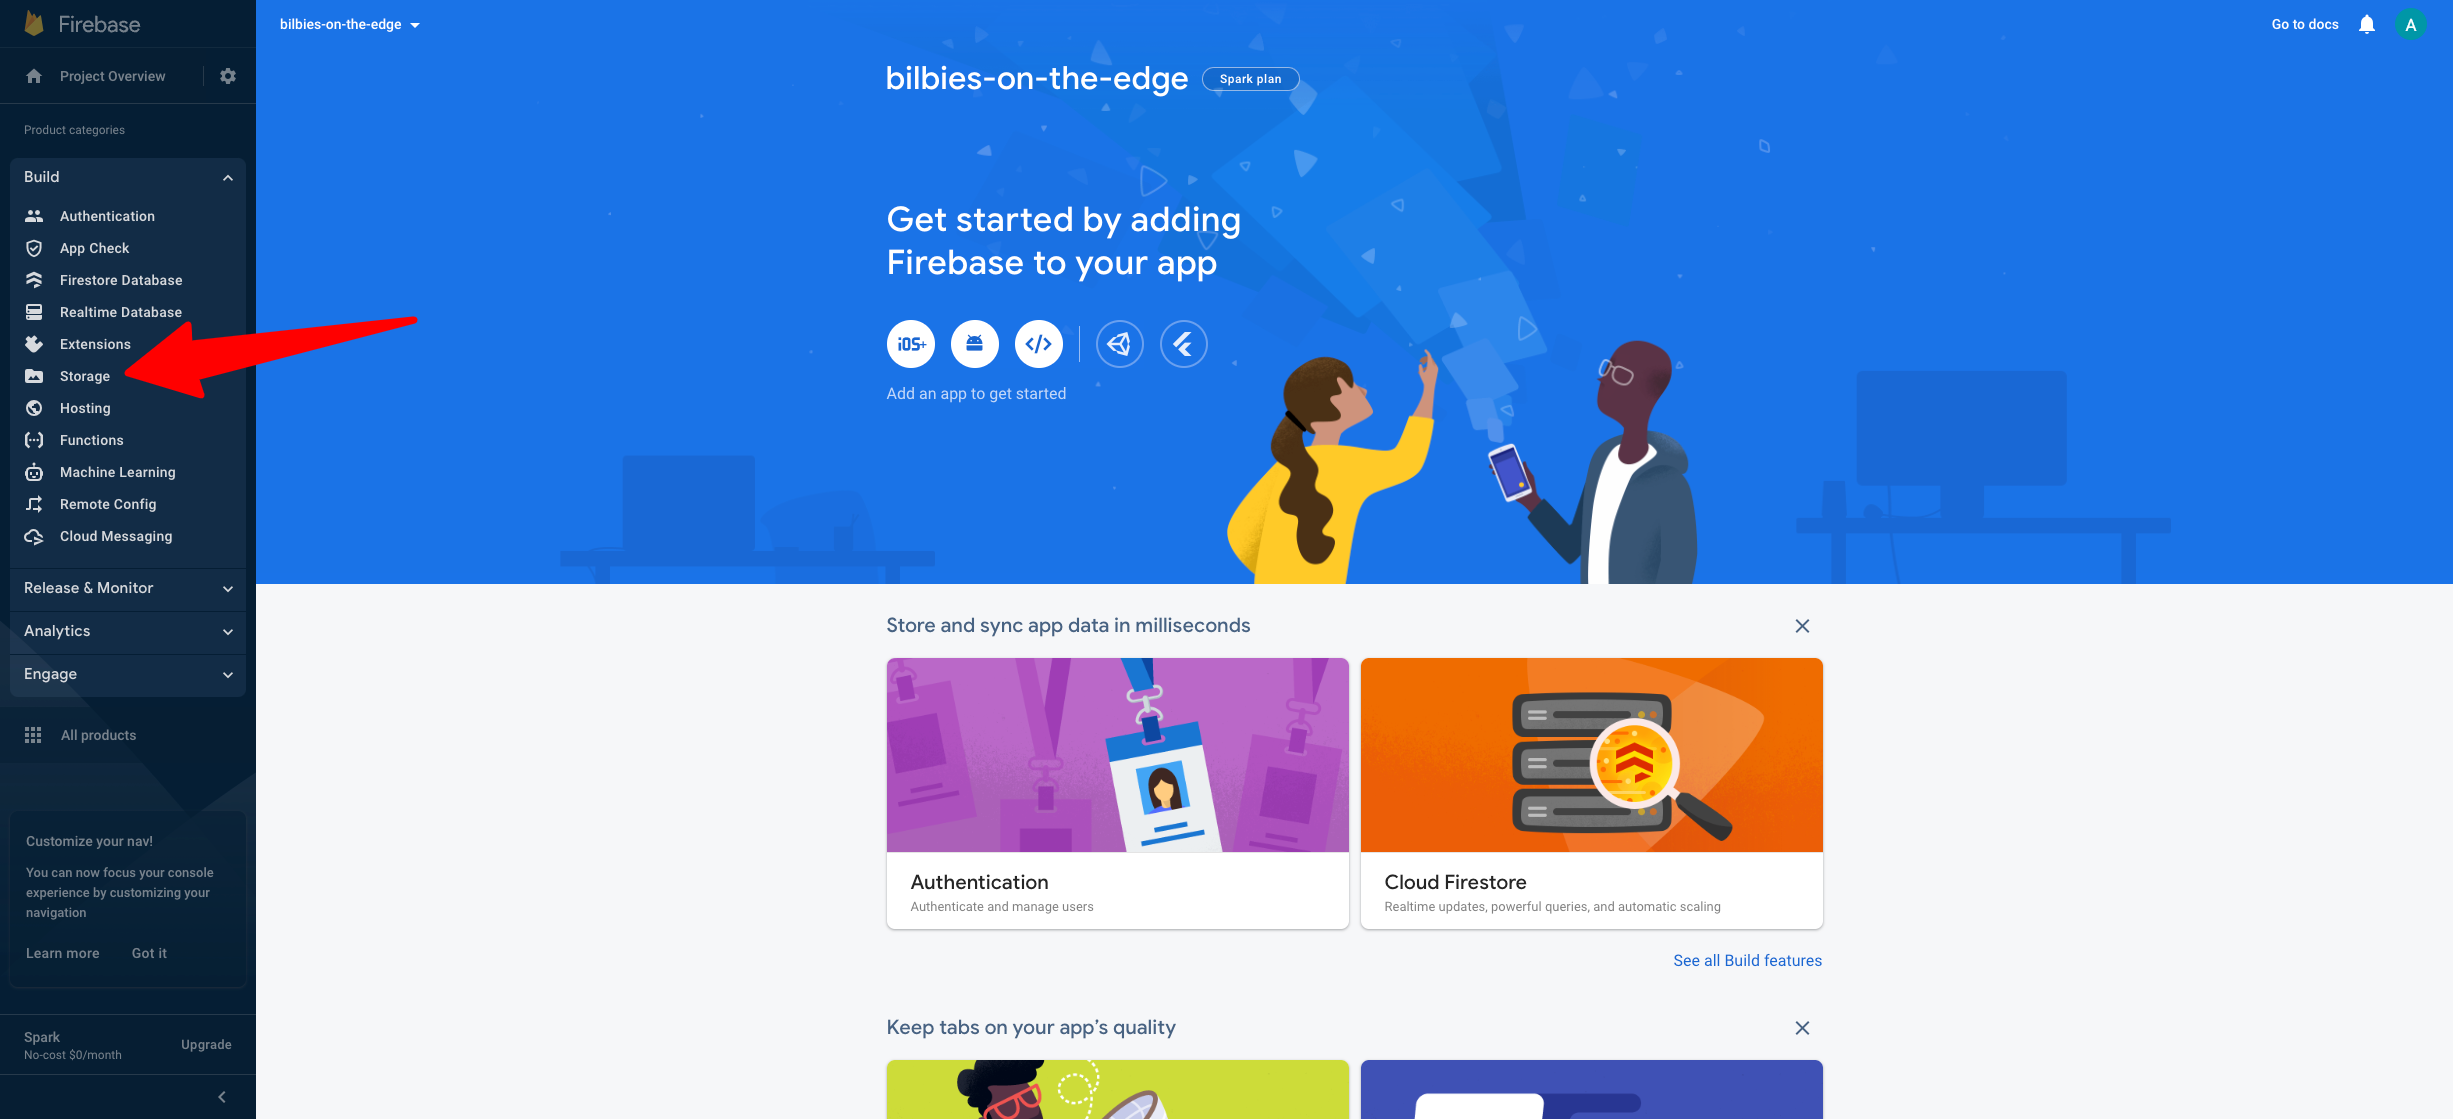
First, we will set up the storage and upload the images. You can find the link here:
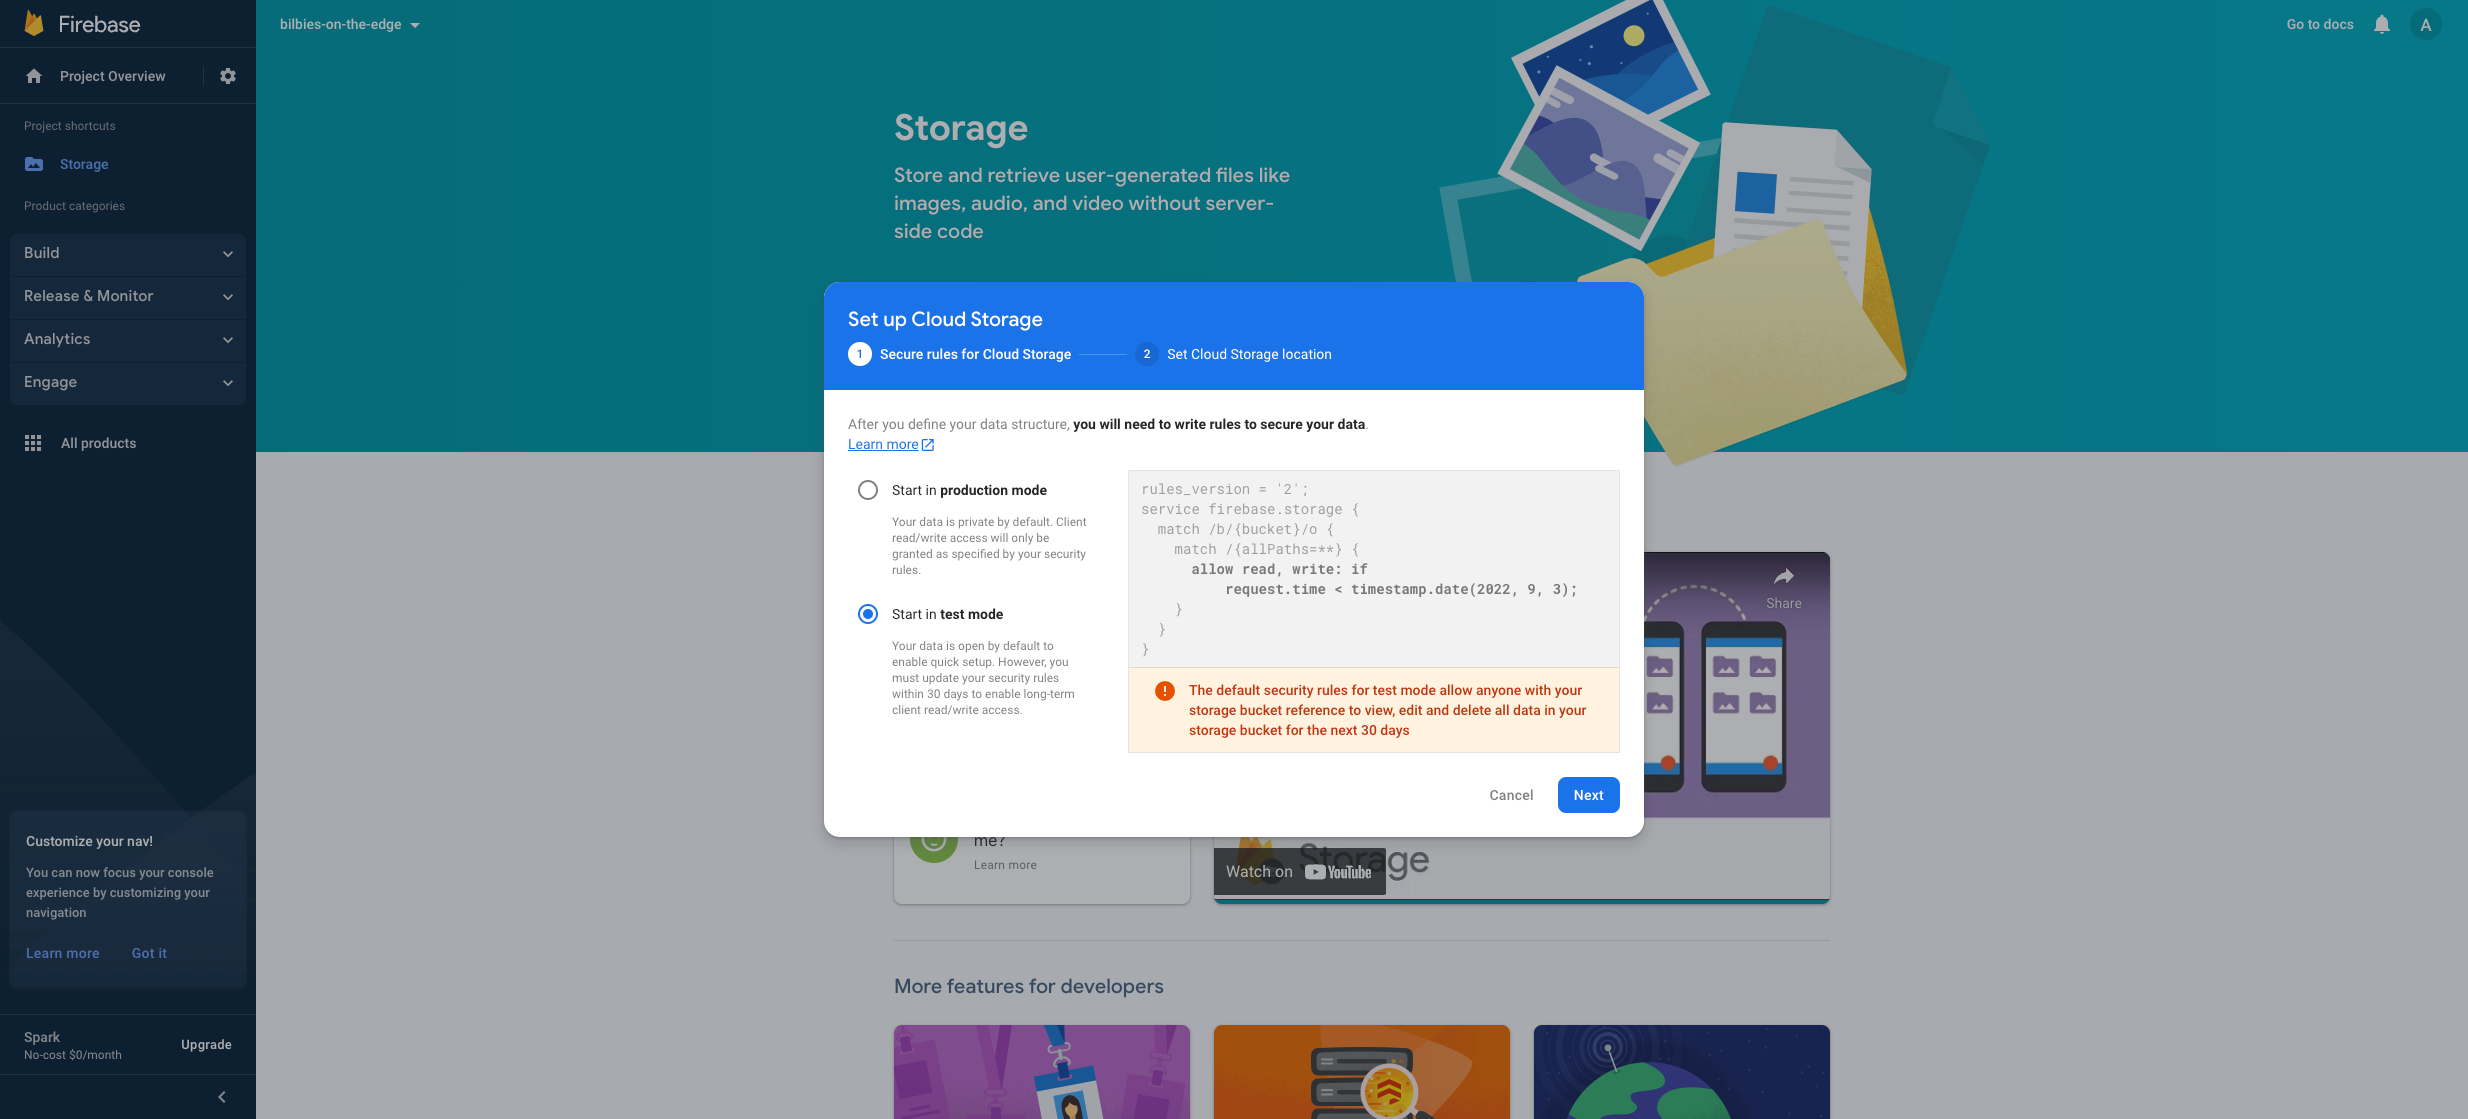
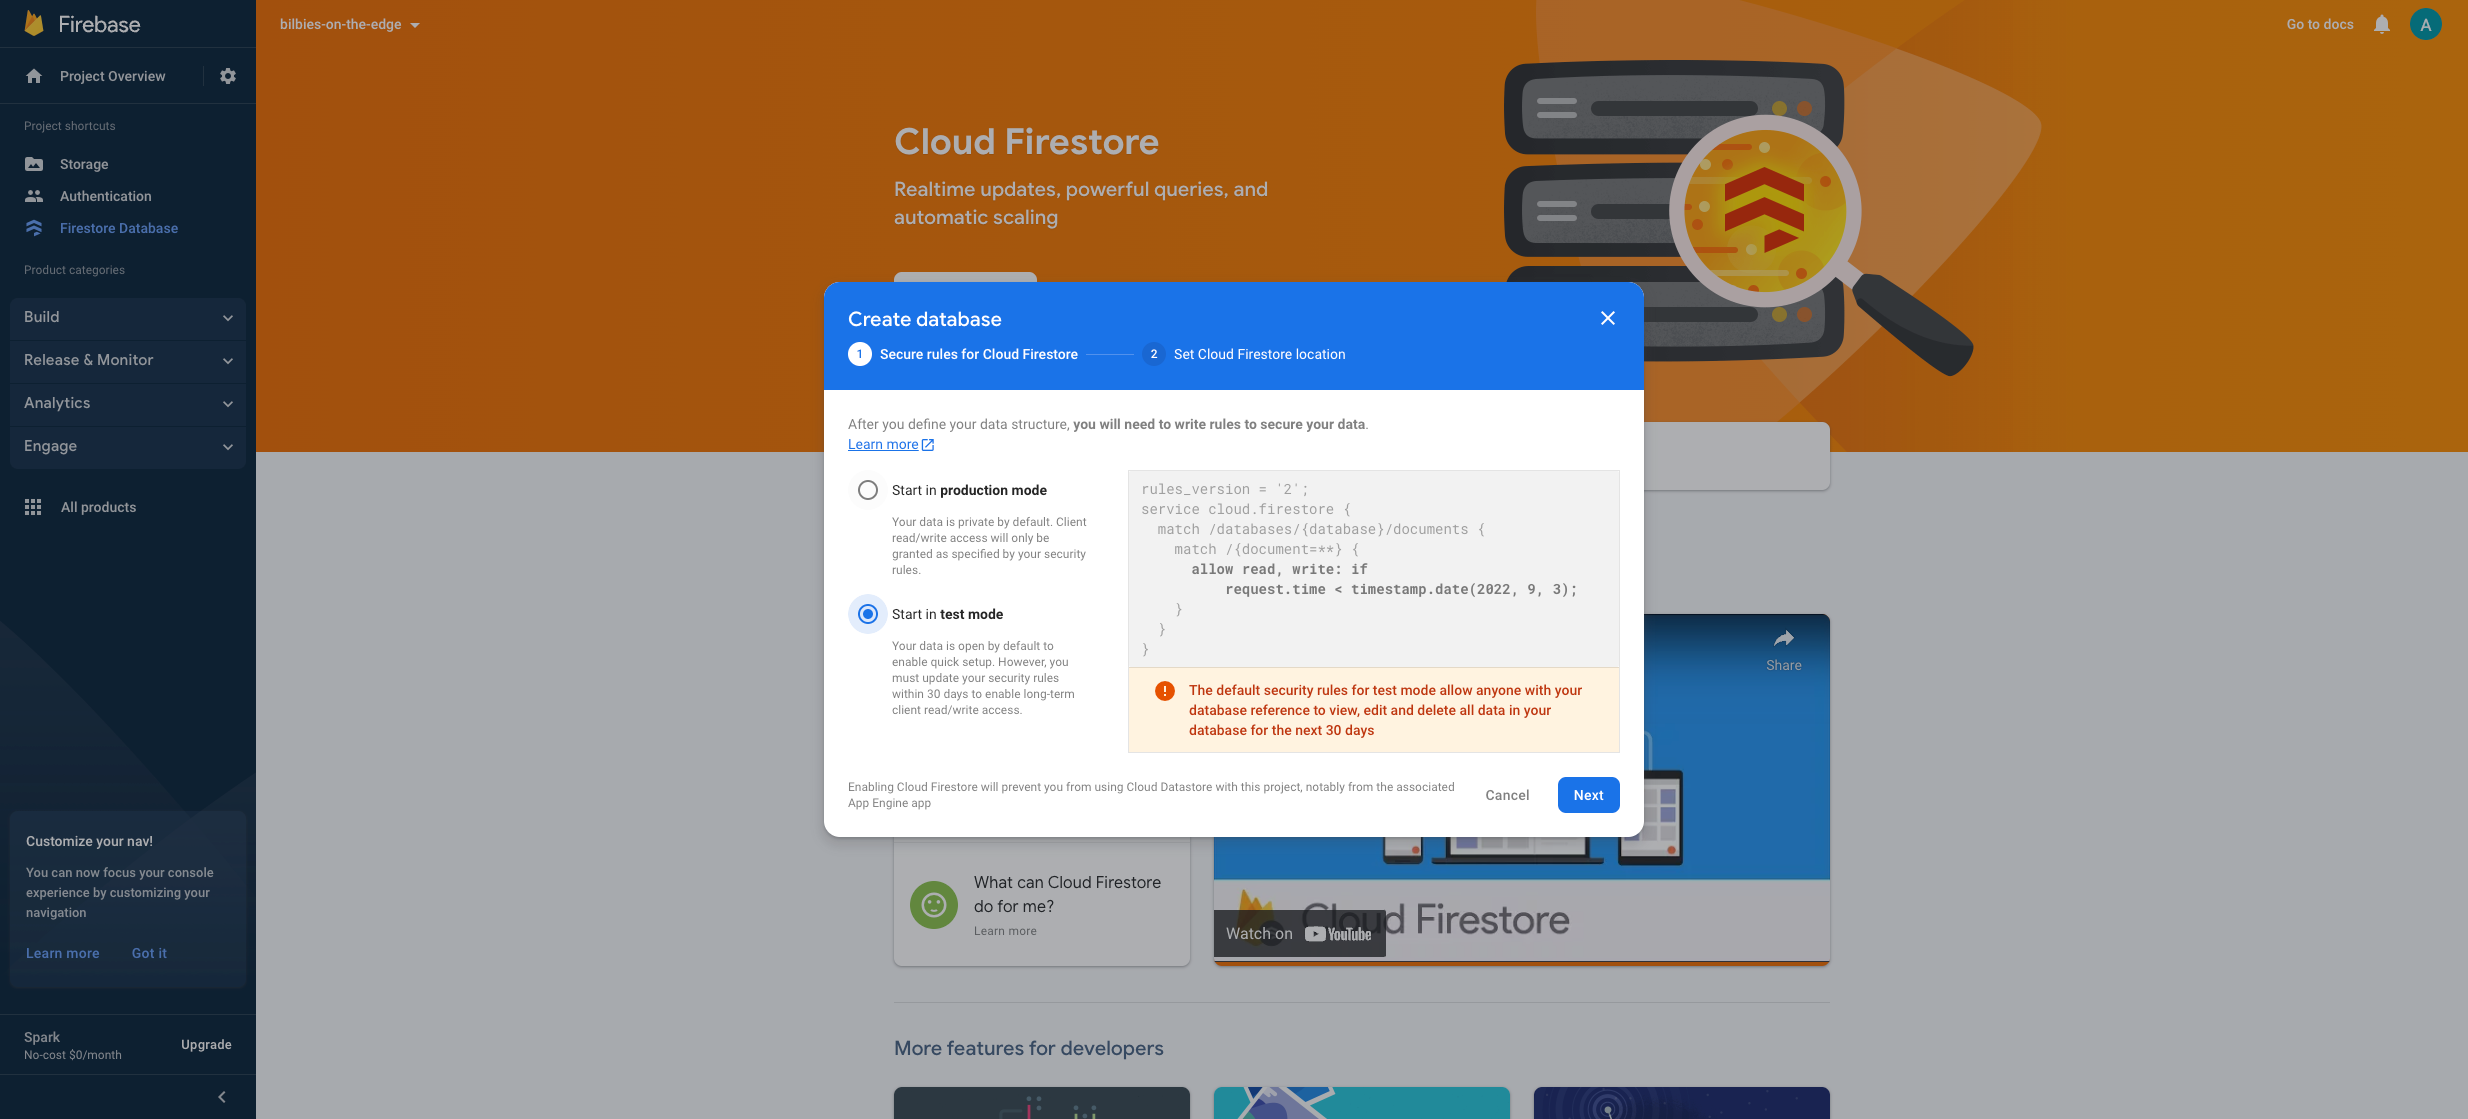
To set up the storage, click set up and select test mode. We will come back and set up the security rules at the end of the blog; starting in test mode will make things easier.
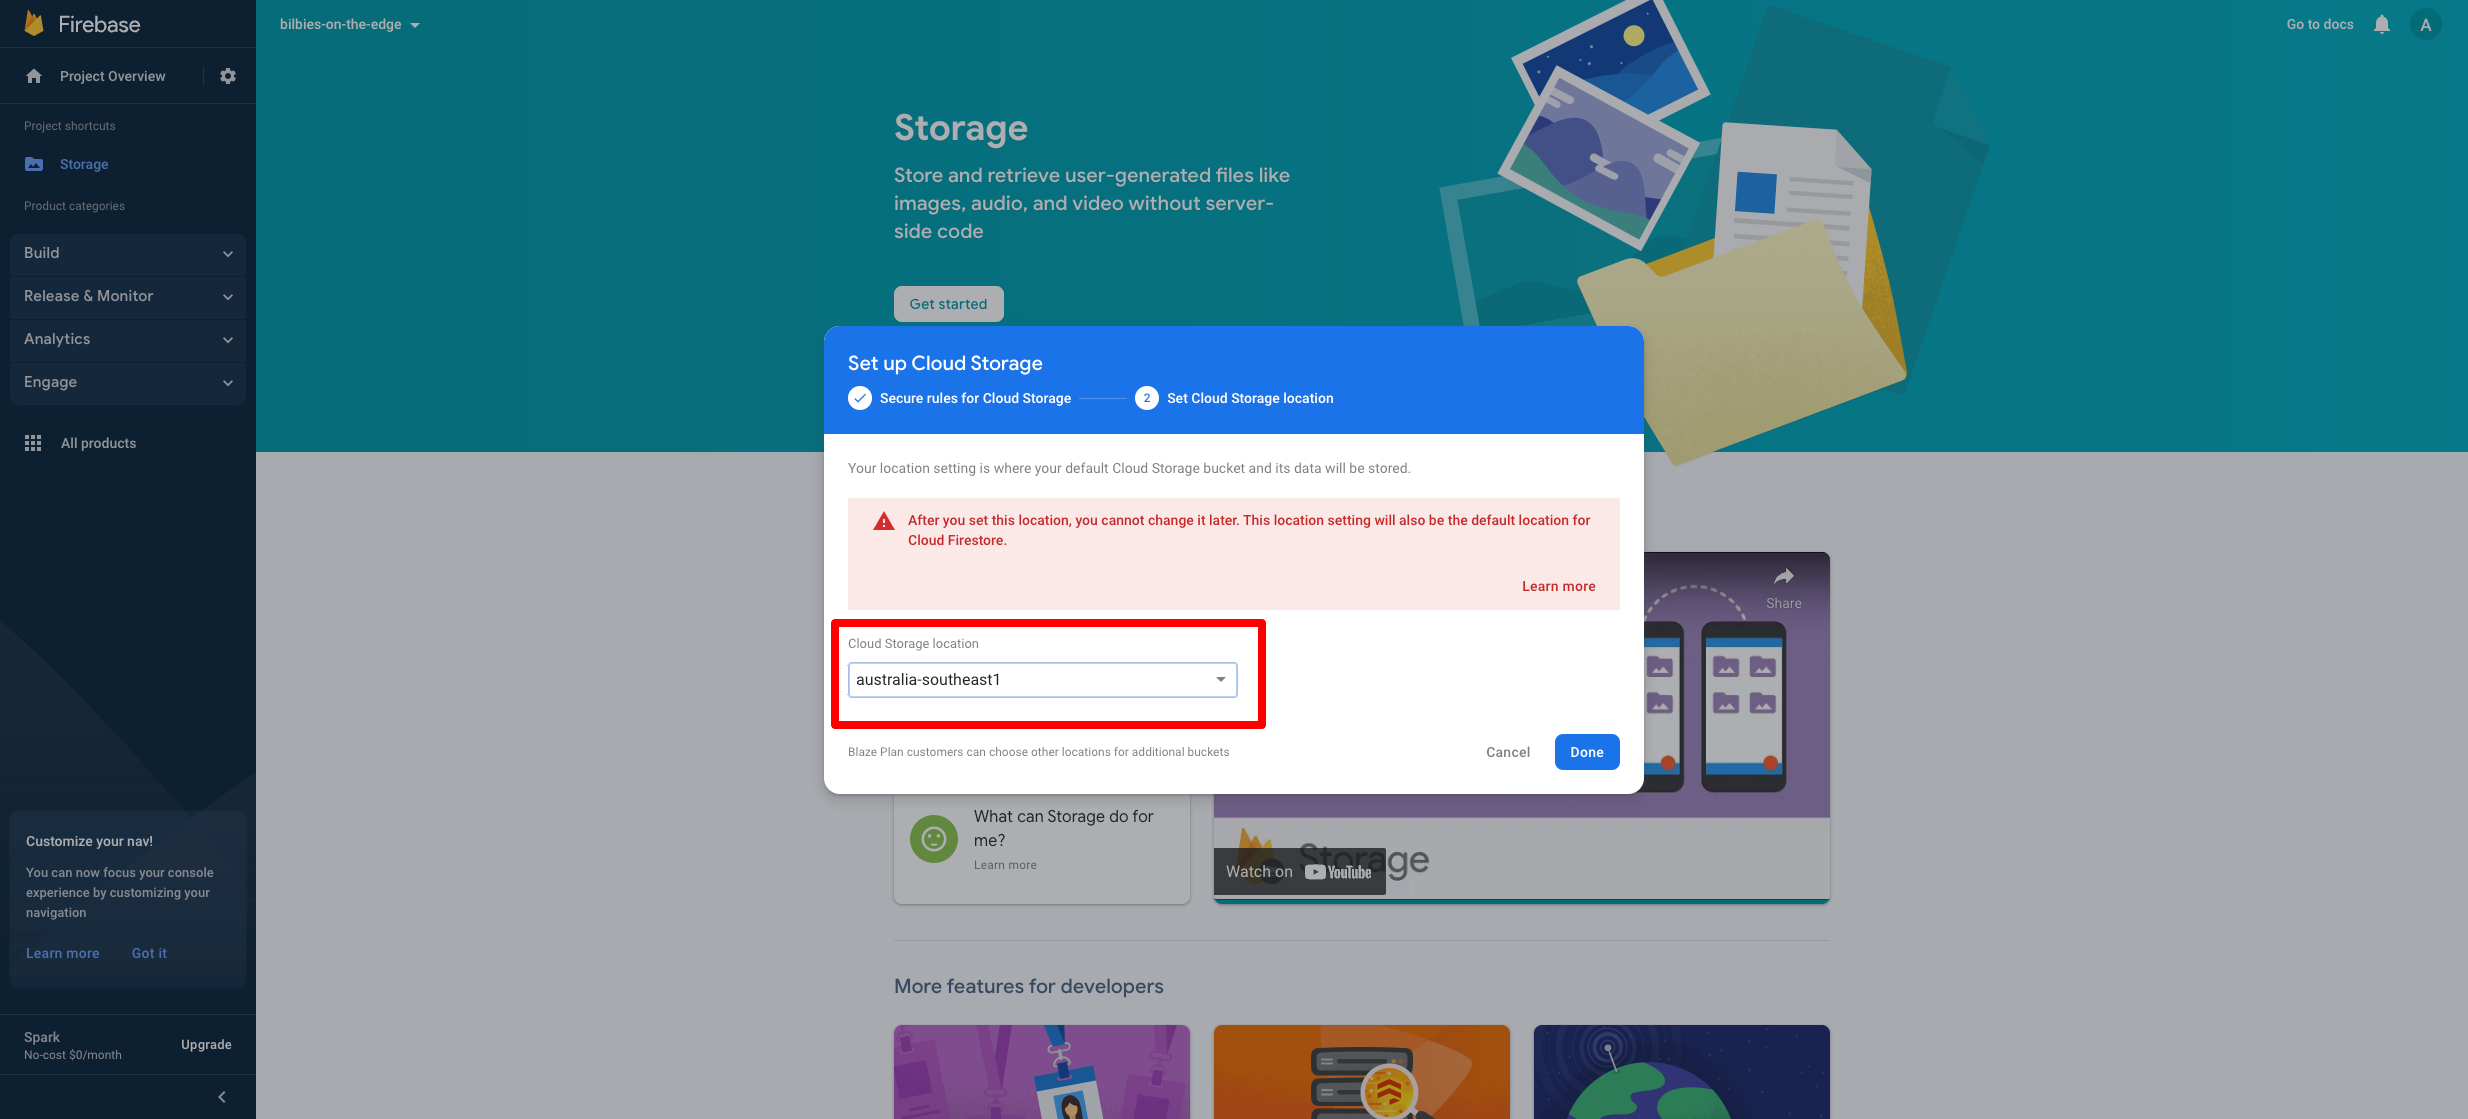
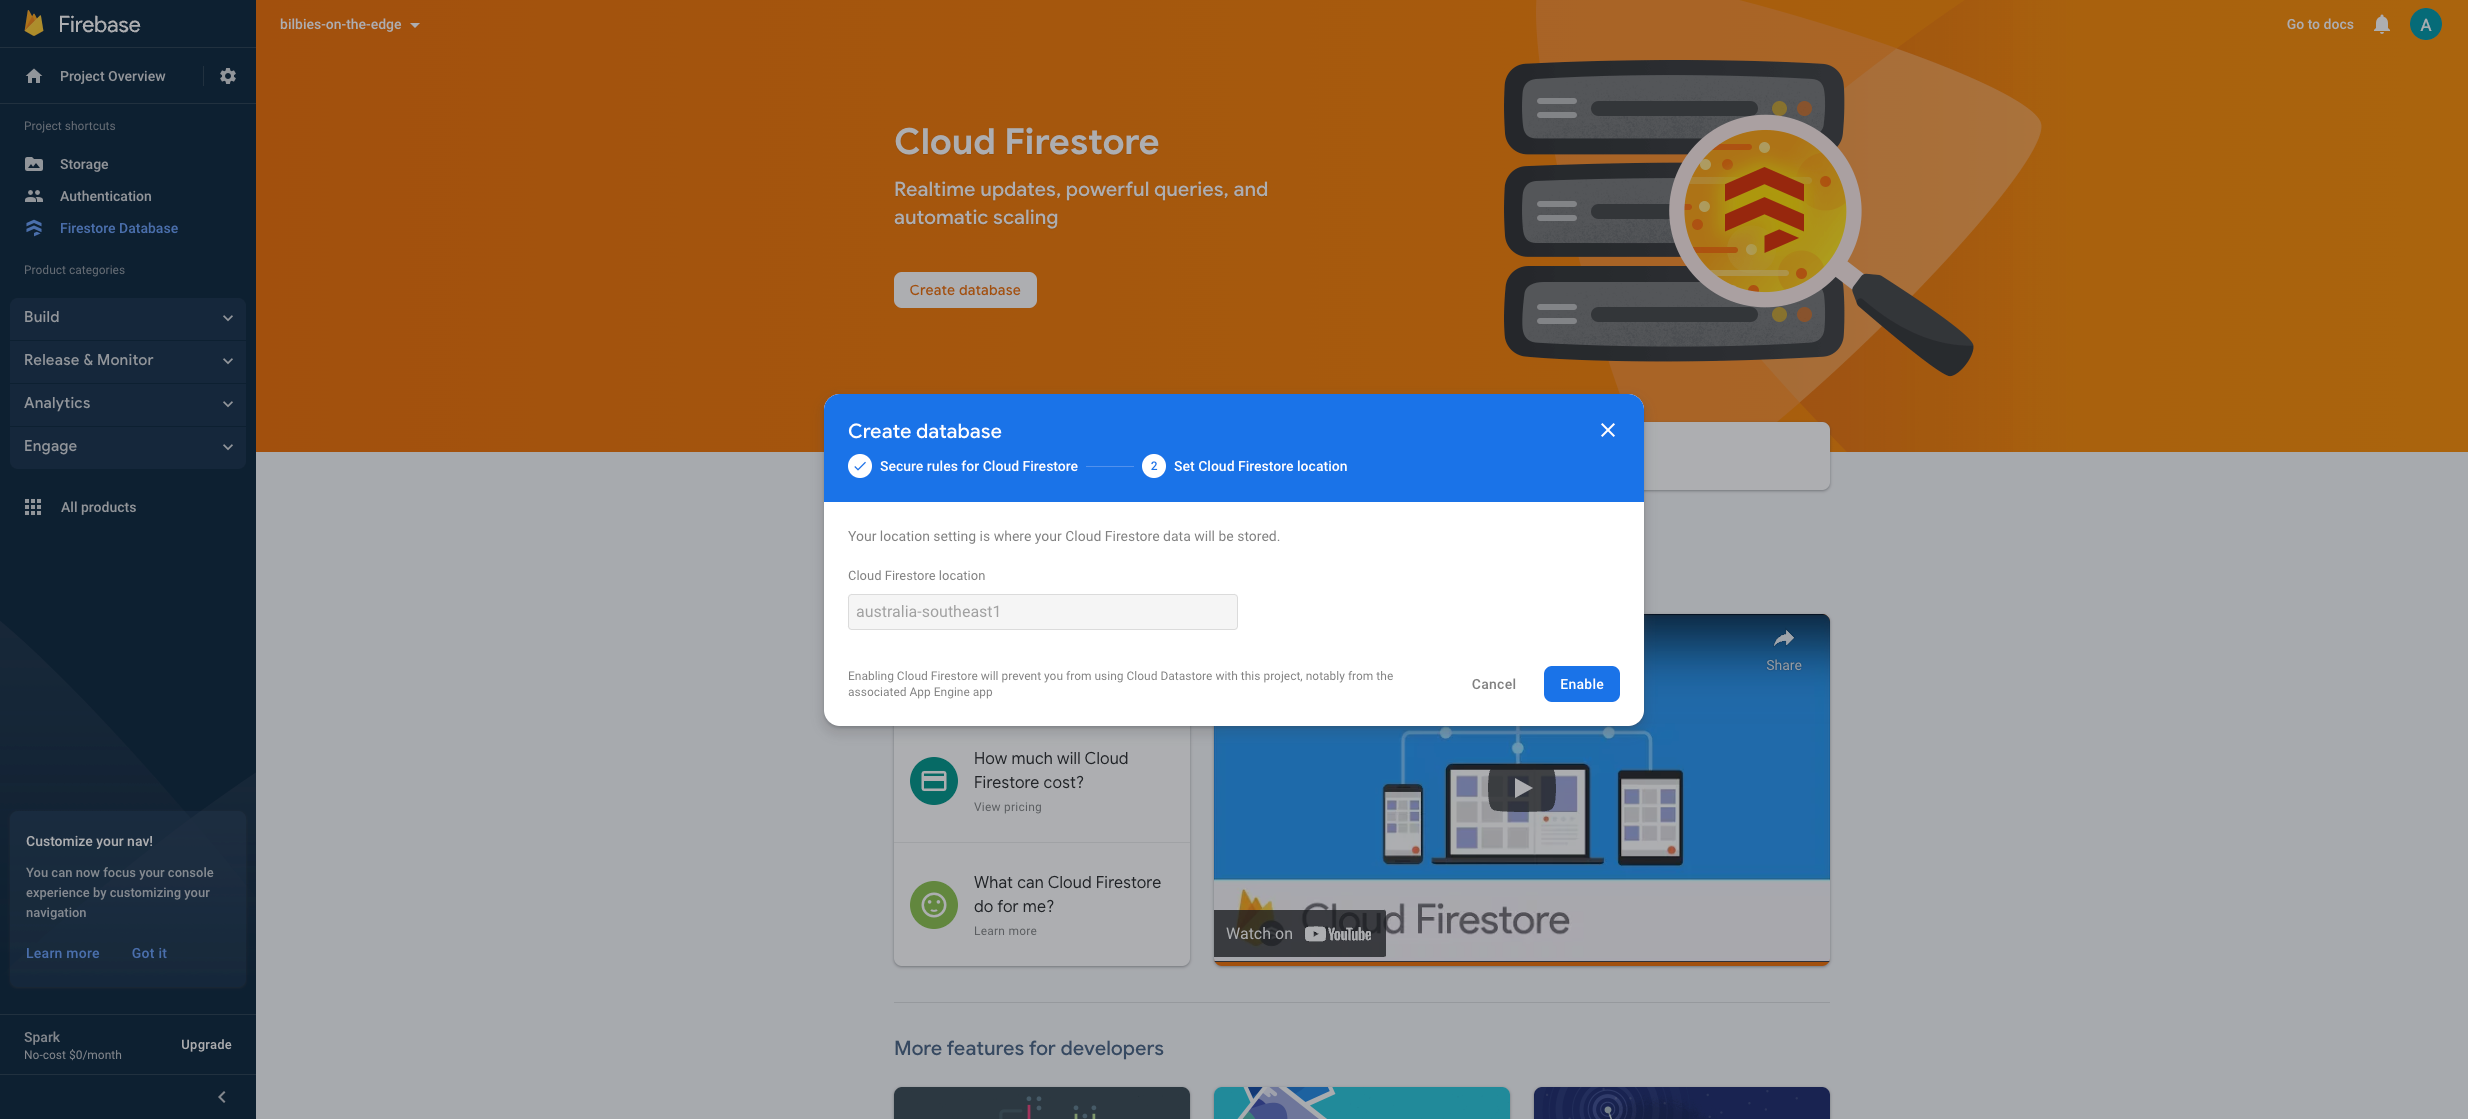
Next, you will need to select the data centre location for the storage. Pick the one closest to you. For me, the nearest data centre is in Australia on the east coast. You cannot change this once set, so make sure you pick correctly. If unsure, you can find the complete list of locations here.
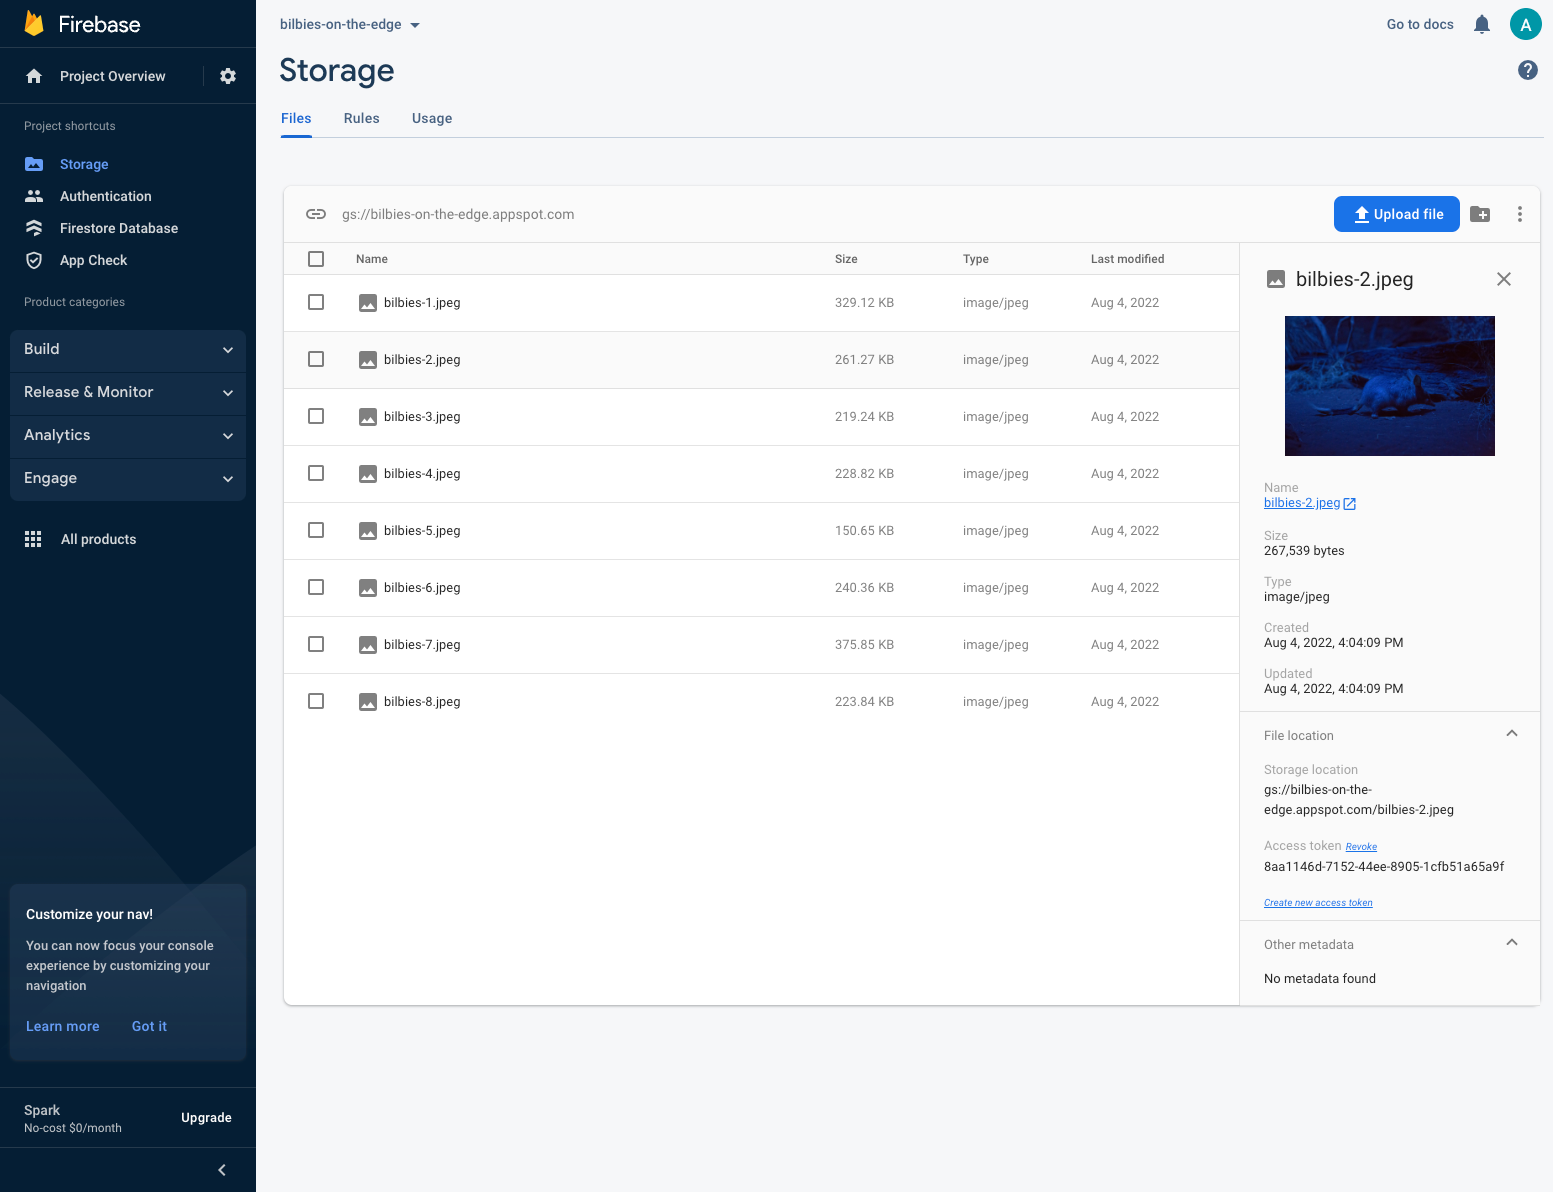
Once set up, you will get a blank screen like this:
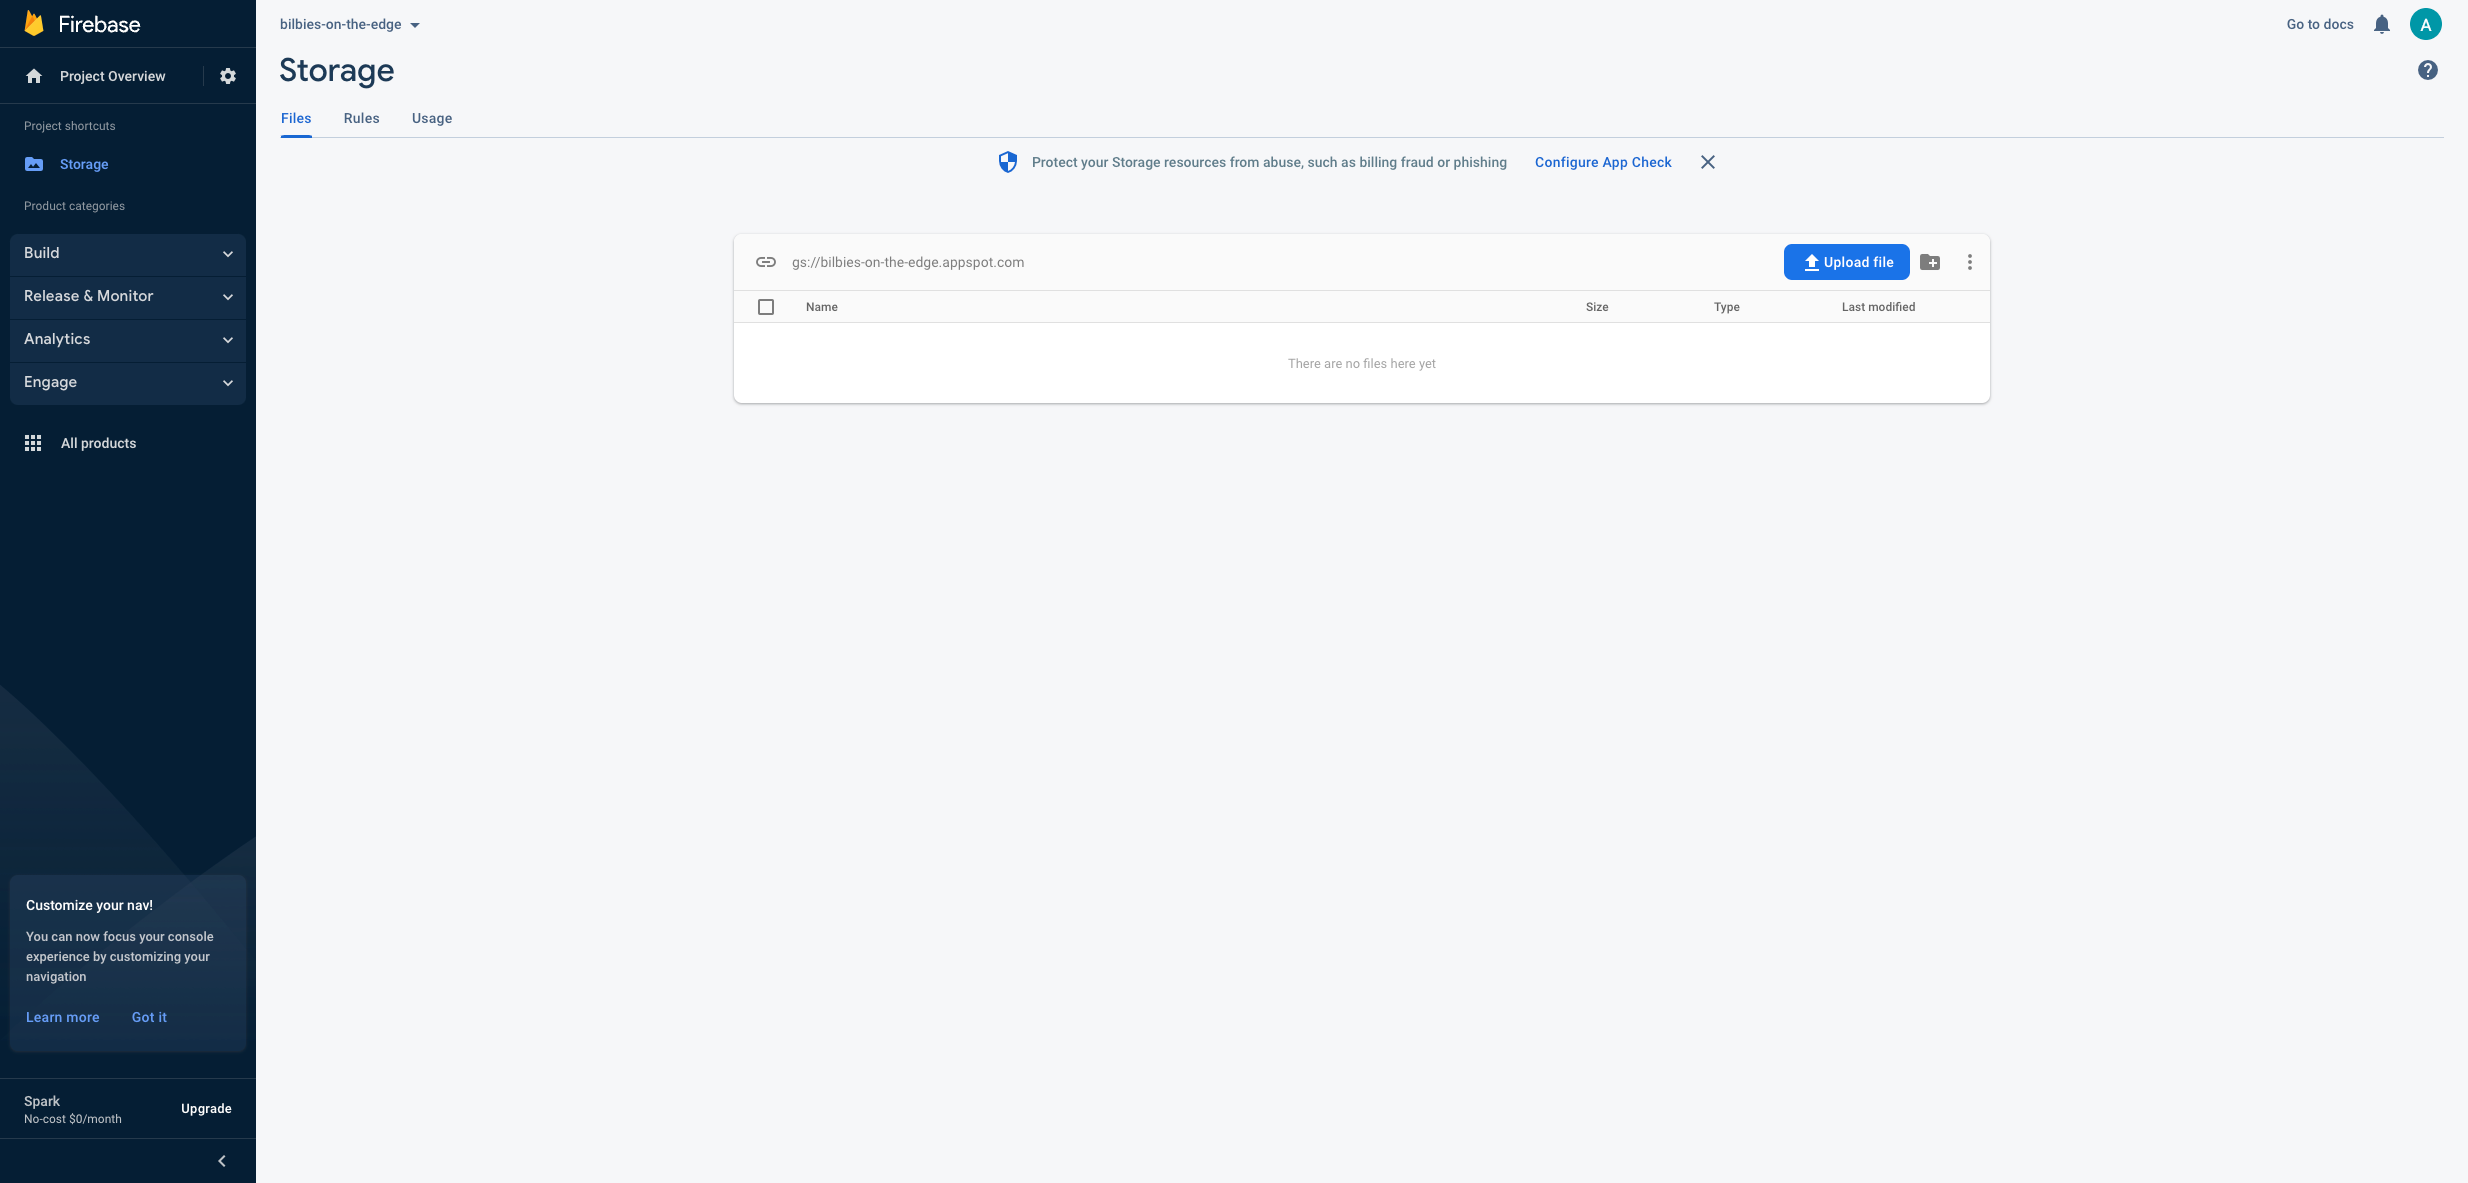
Now upload all the images to the storage using an iterative naming convention for the files.
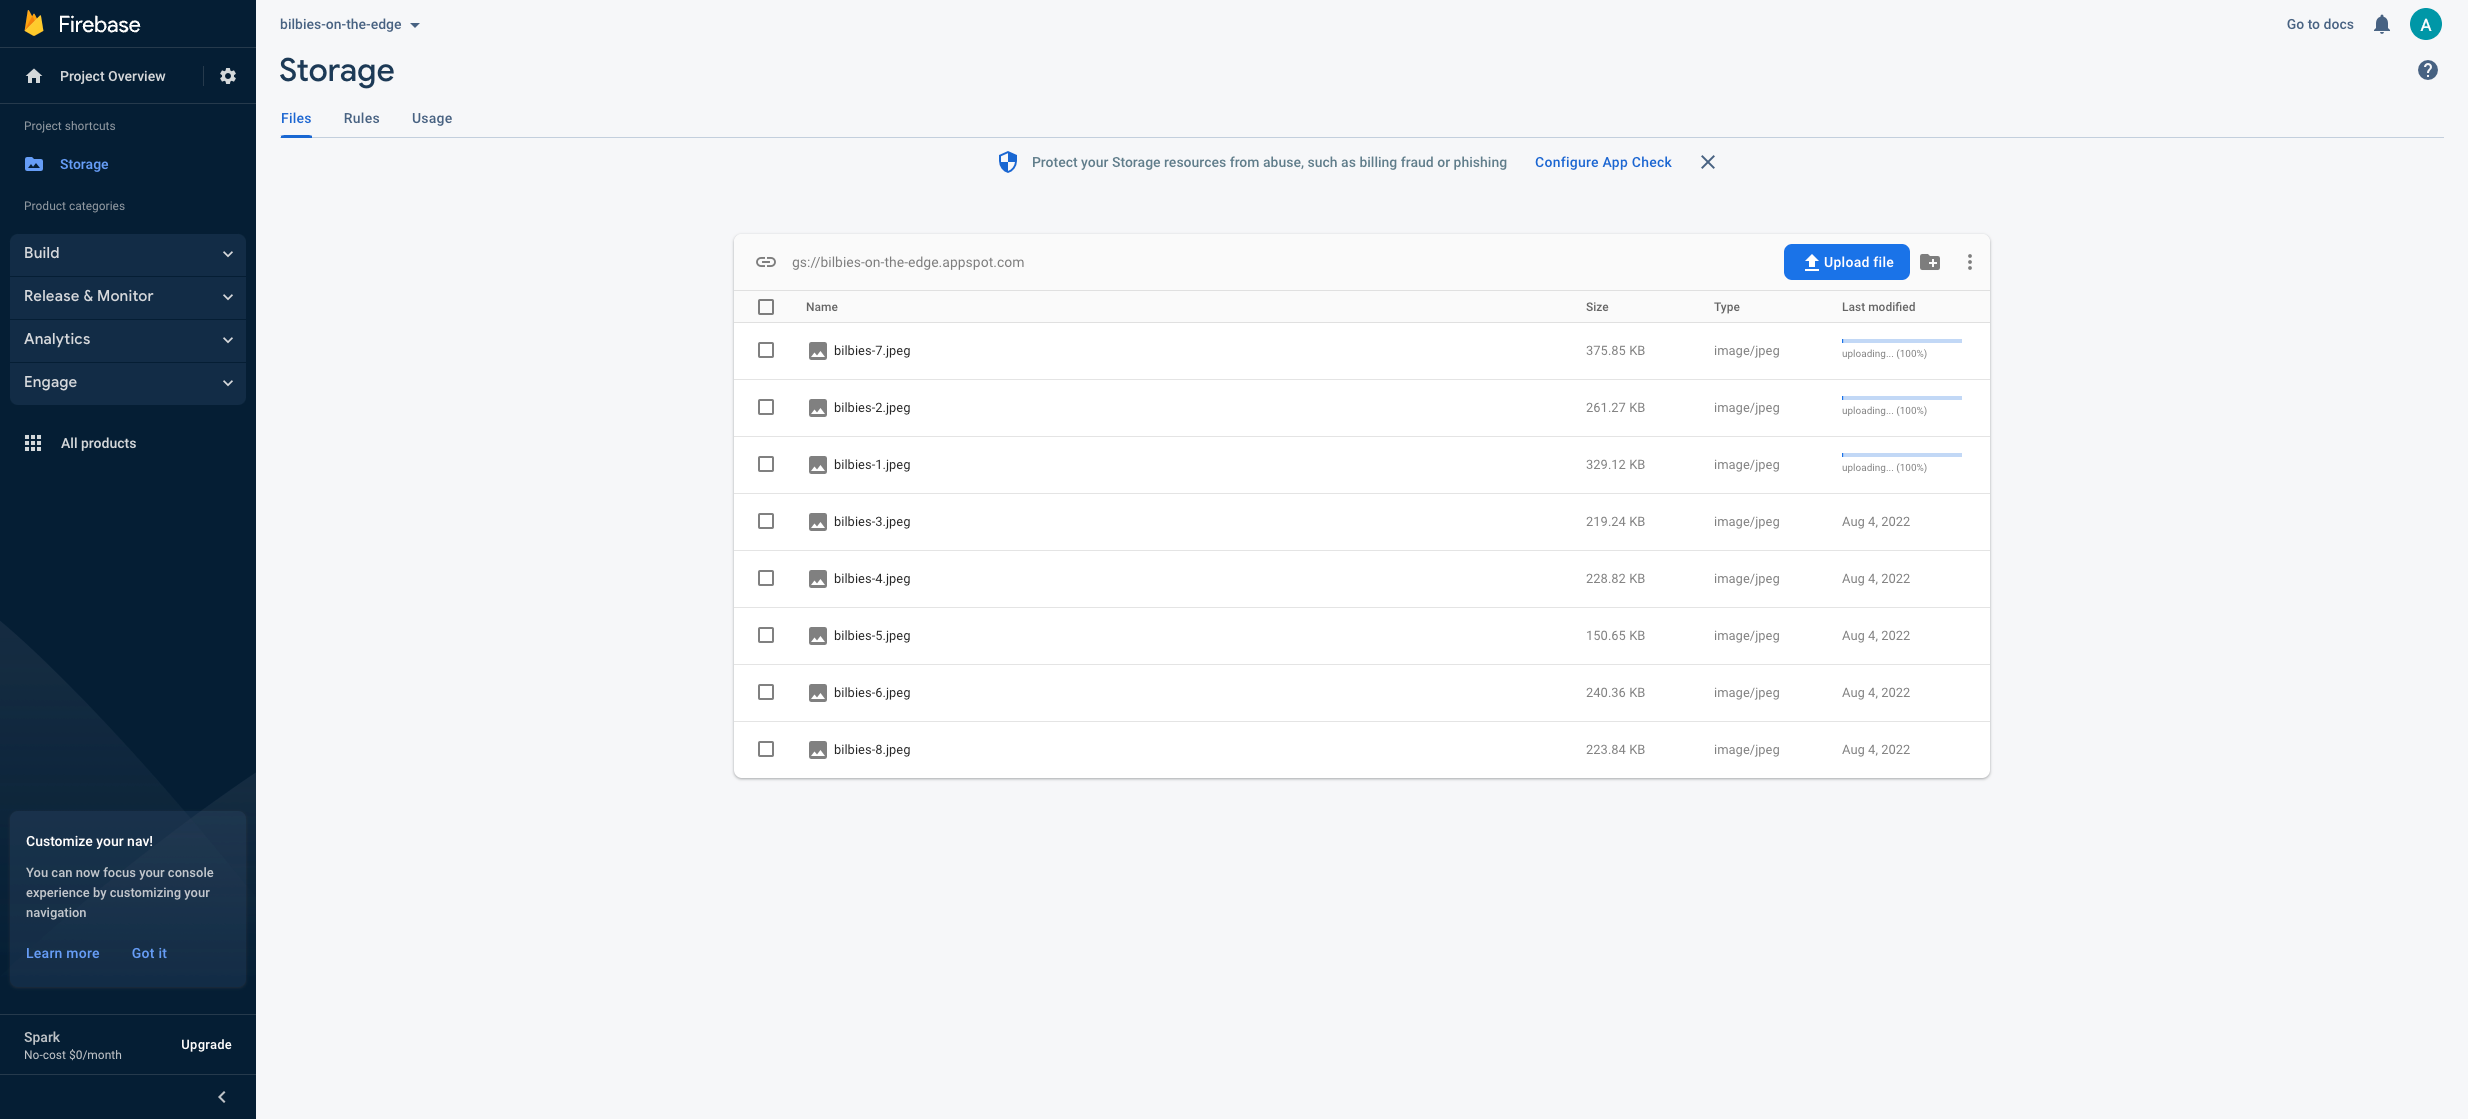
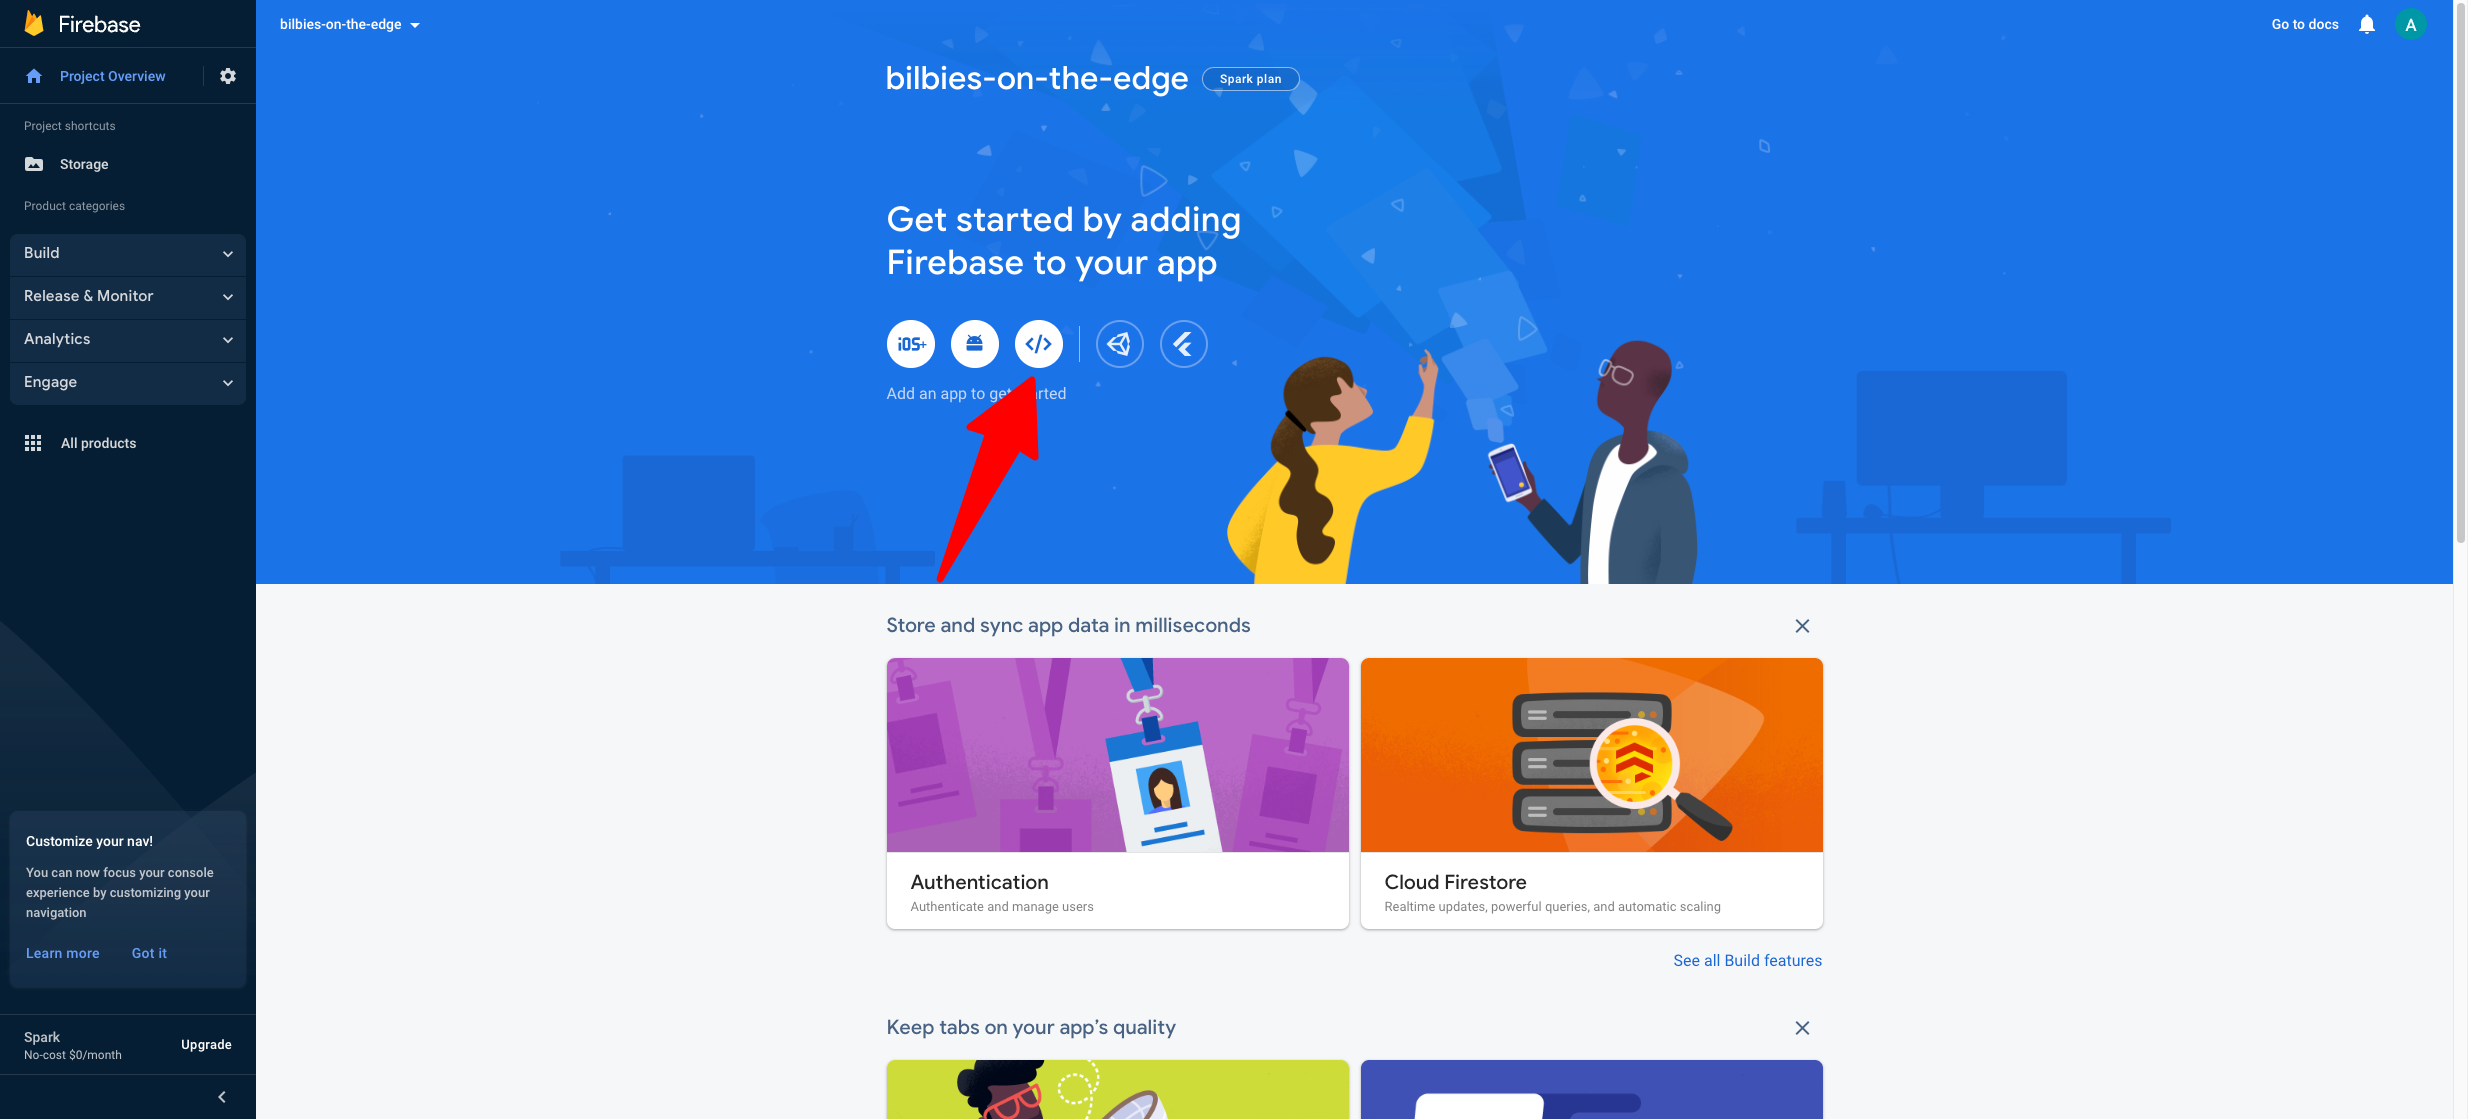
With the storage now populated with images, we need to set up the project in Firebase. Click the project overview in the top left and then click ‘add web app’.
The project needs a name. I will call mine deno-server. When creating the project, copy the firebase config object; you will need this later for our environmental variables.
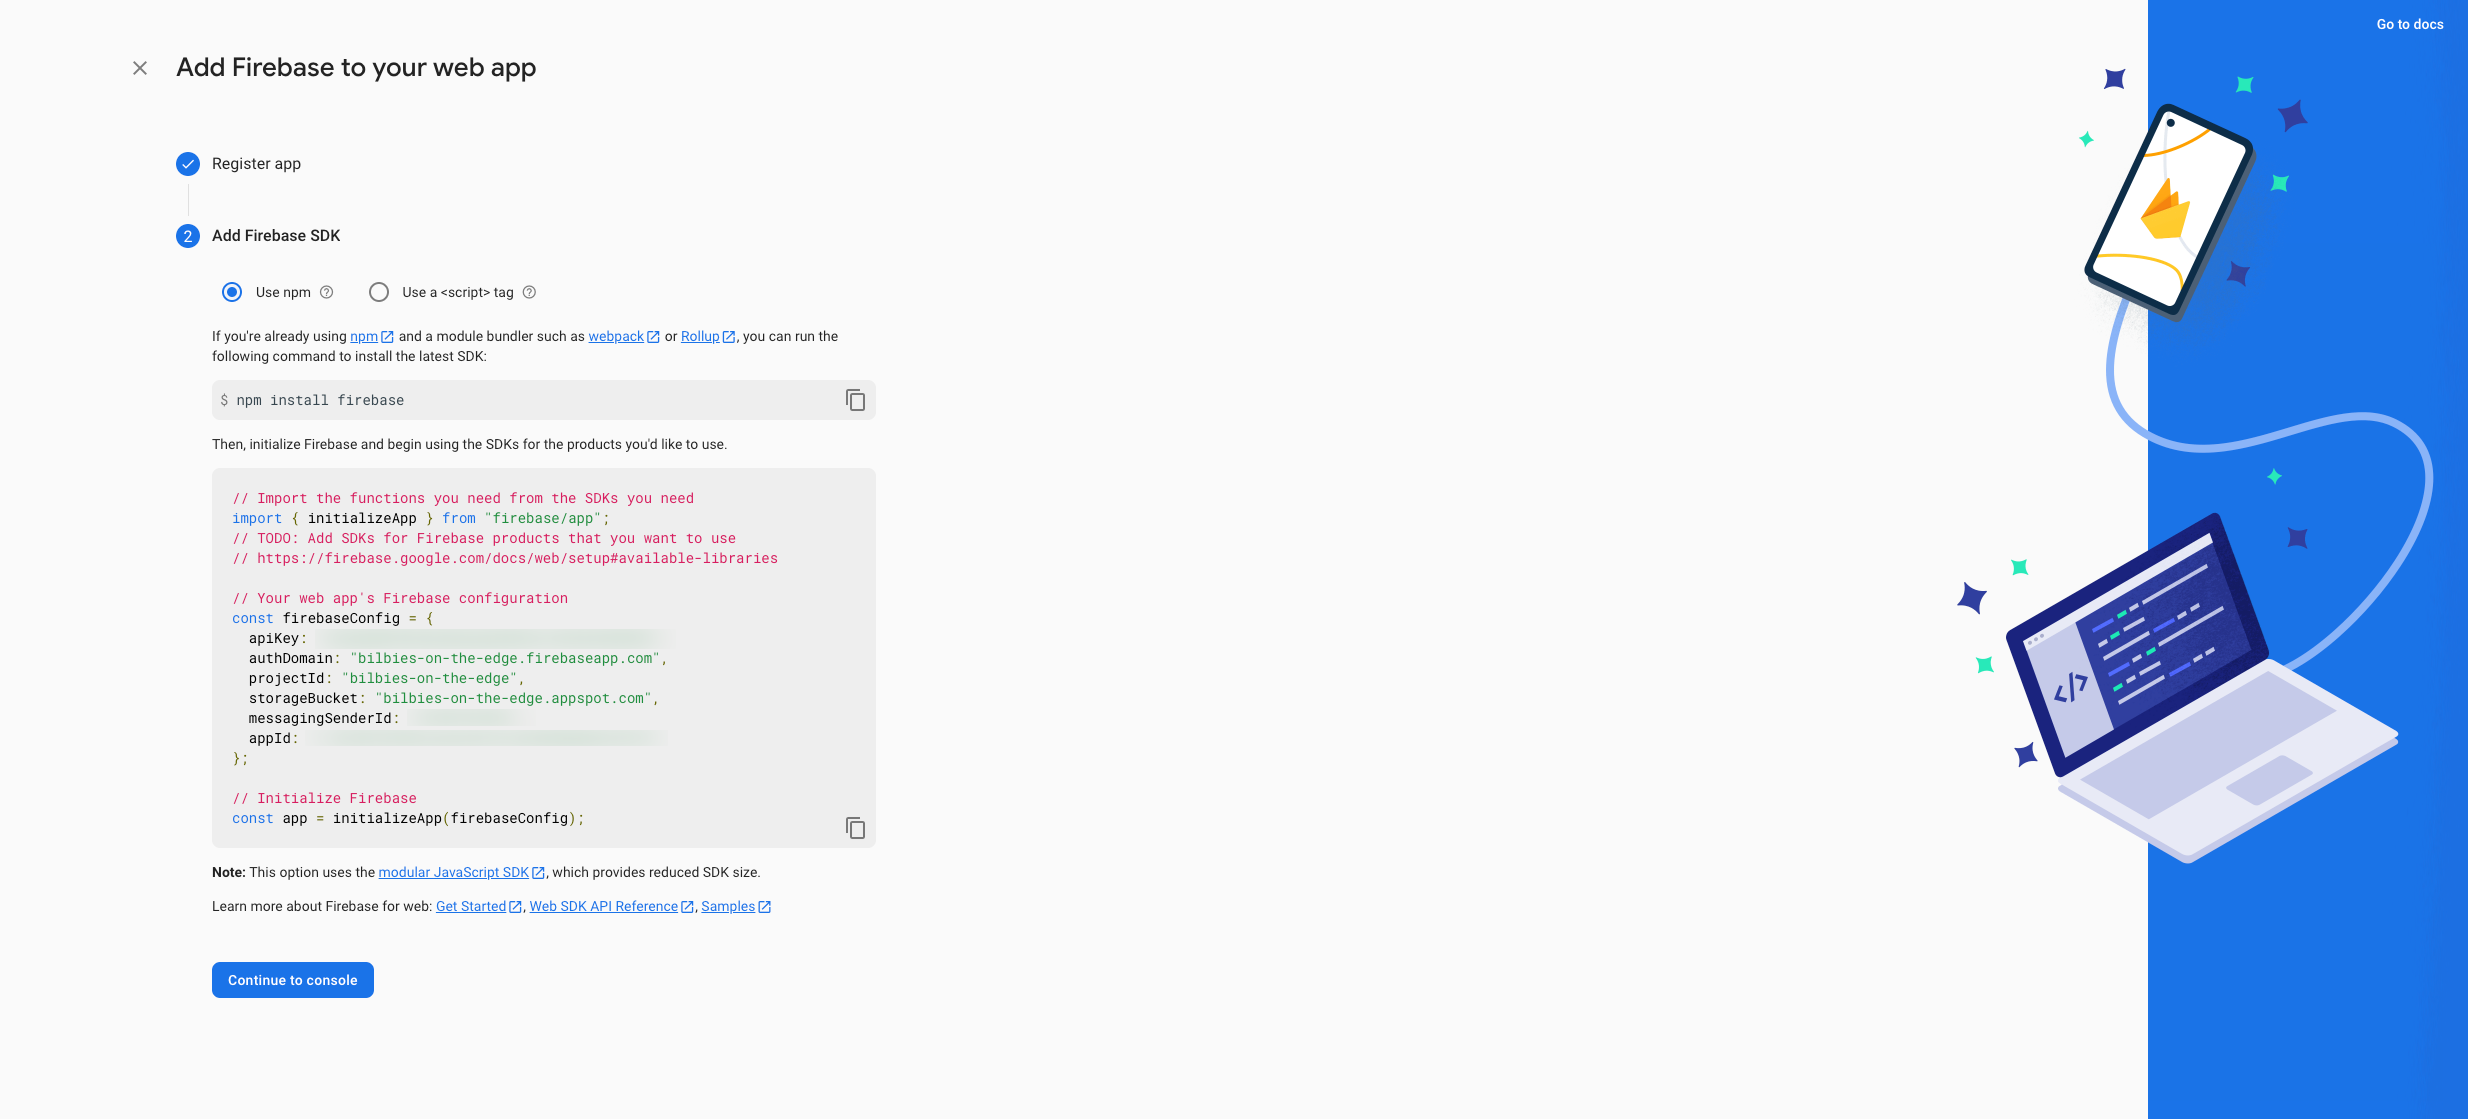
Web standards are the building blocks for many of Deno APIs, meaning Deno is more compatible with Firebase’s web framework. Even though our code runs on the server, we will use the Firebase web framework. We will still need a few polyfills, but you will see this in more detail when we jump back into the code.
Click ‘continue’. Then click ‘build’ in the left side menu and select ‘Firestore Database’. Go through set up and choose ‘test mode’ again. We will update the rules at the end of the blog.
The location for the database snaps to the same option you selected in storage during setup.
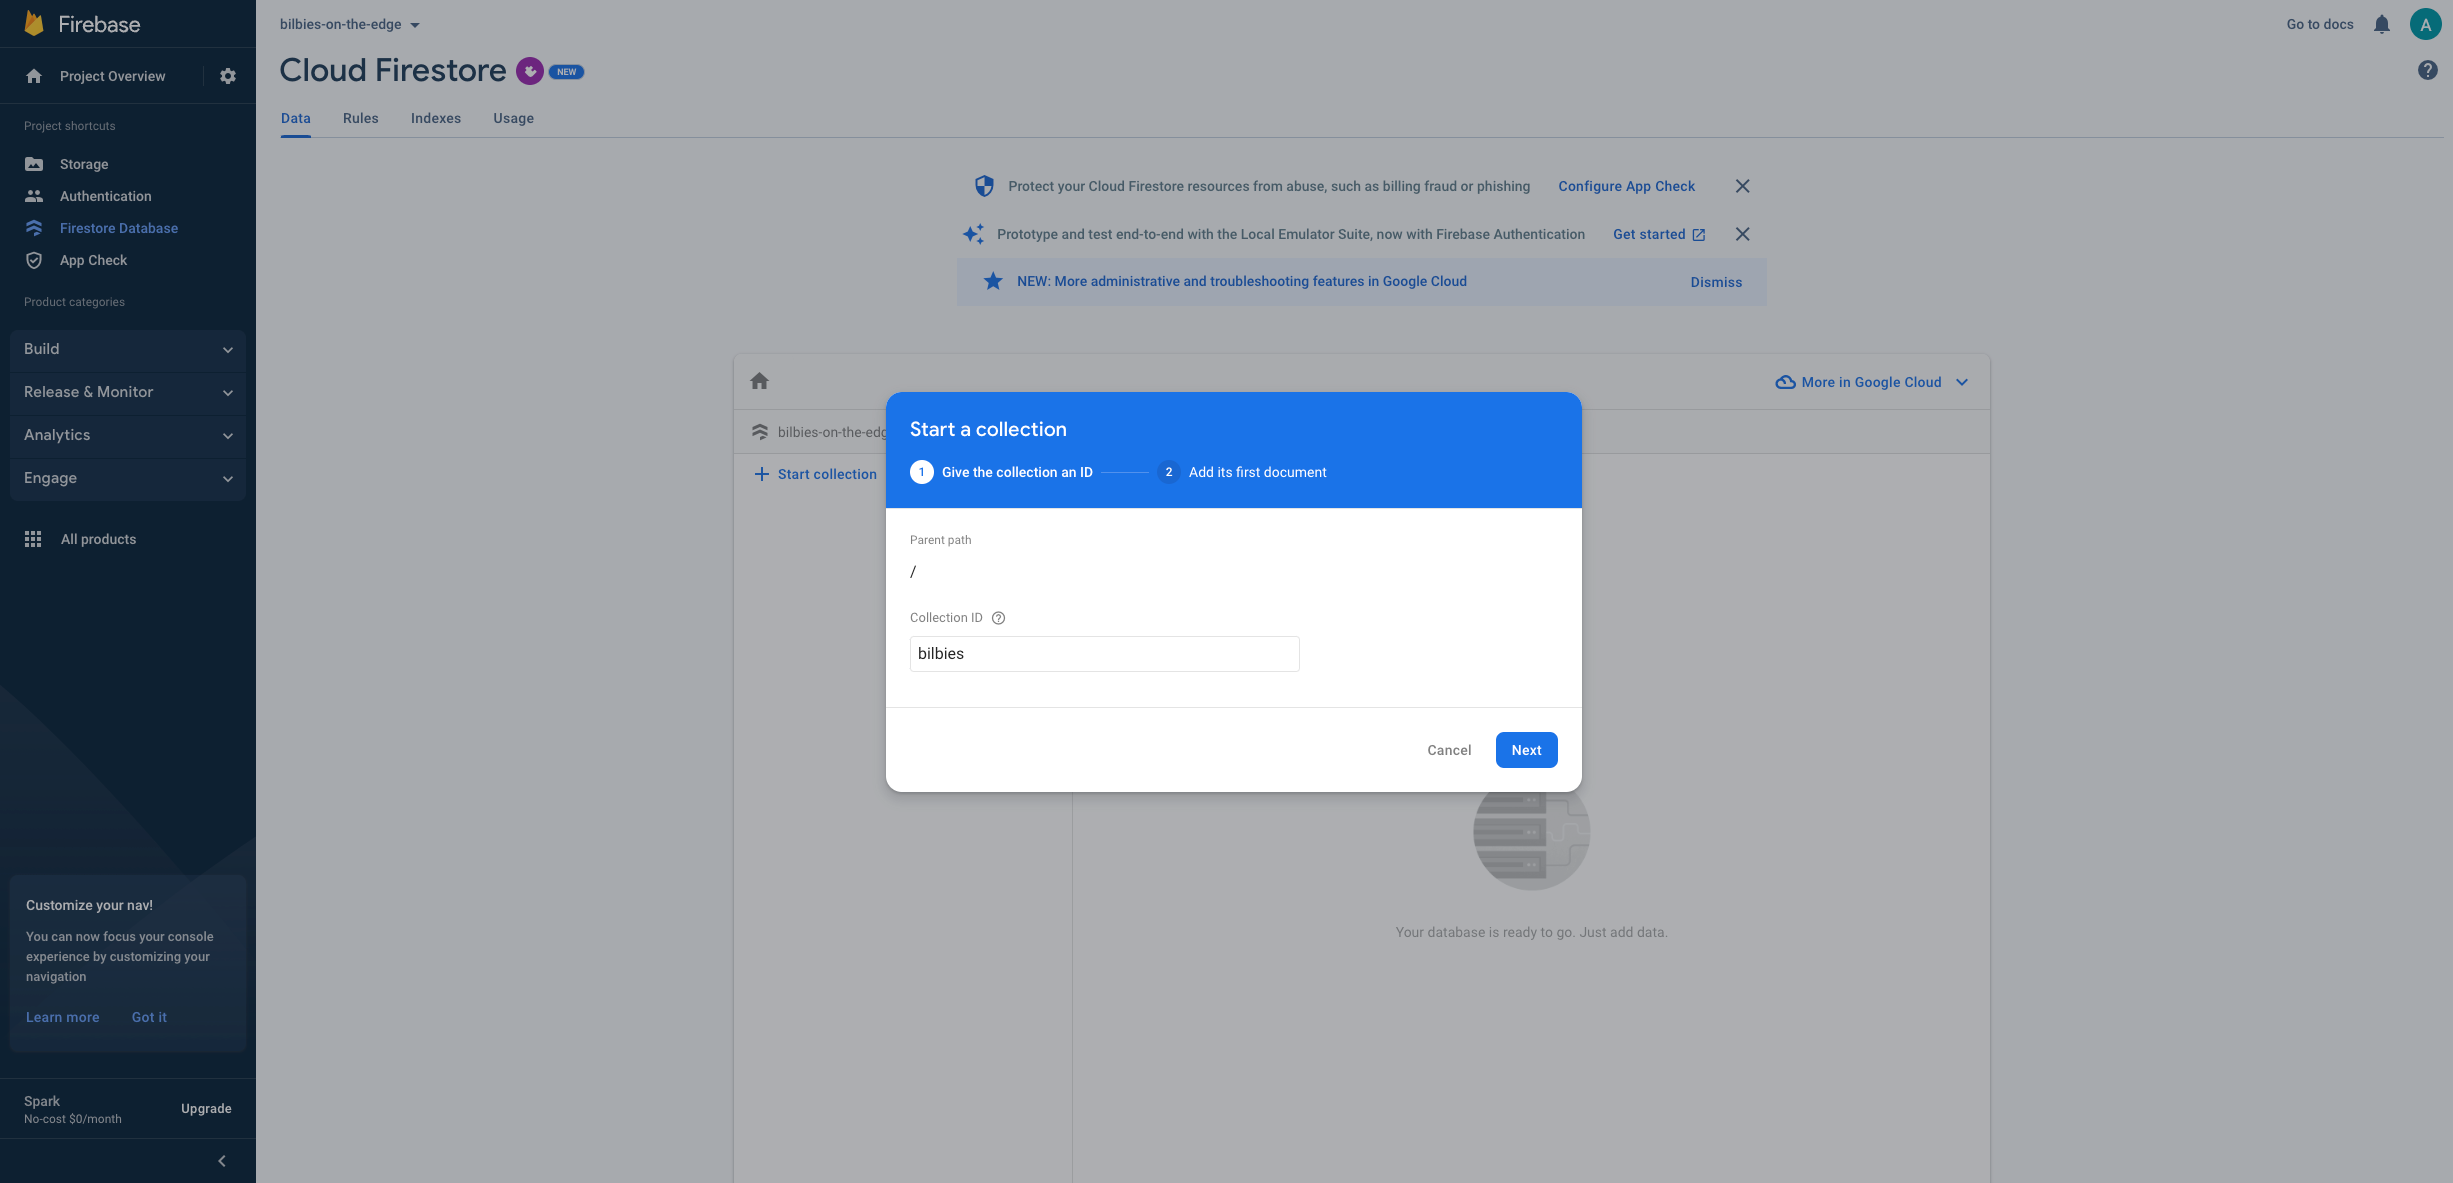
After setting up the Firestore database, we must create a new collection to store the data. I will name my collection bilbies as that is the data stored there. If you are new to document-based databases, a good naming convention is to create a plural of the document name. An example would be a document representing a user, meaning we would call the collection ‘users’.
Create an entry for each one of the images uploaded into the storage. When adding one, select the auto-generate id option.
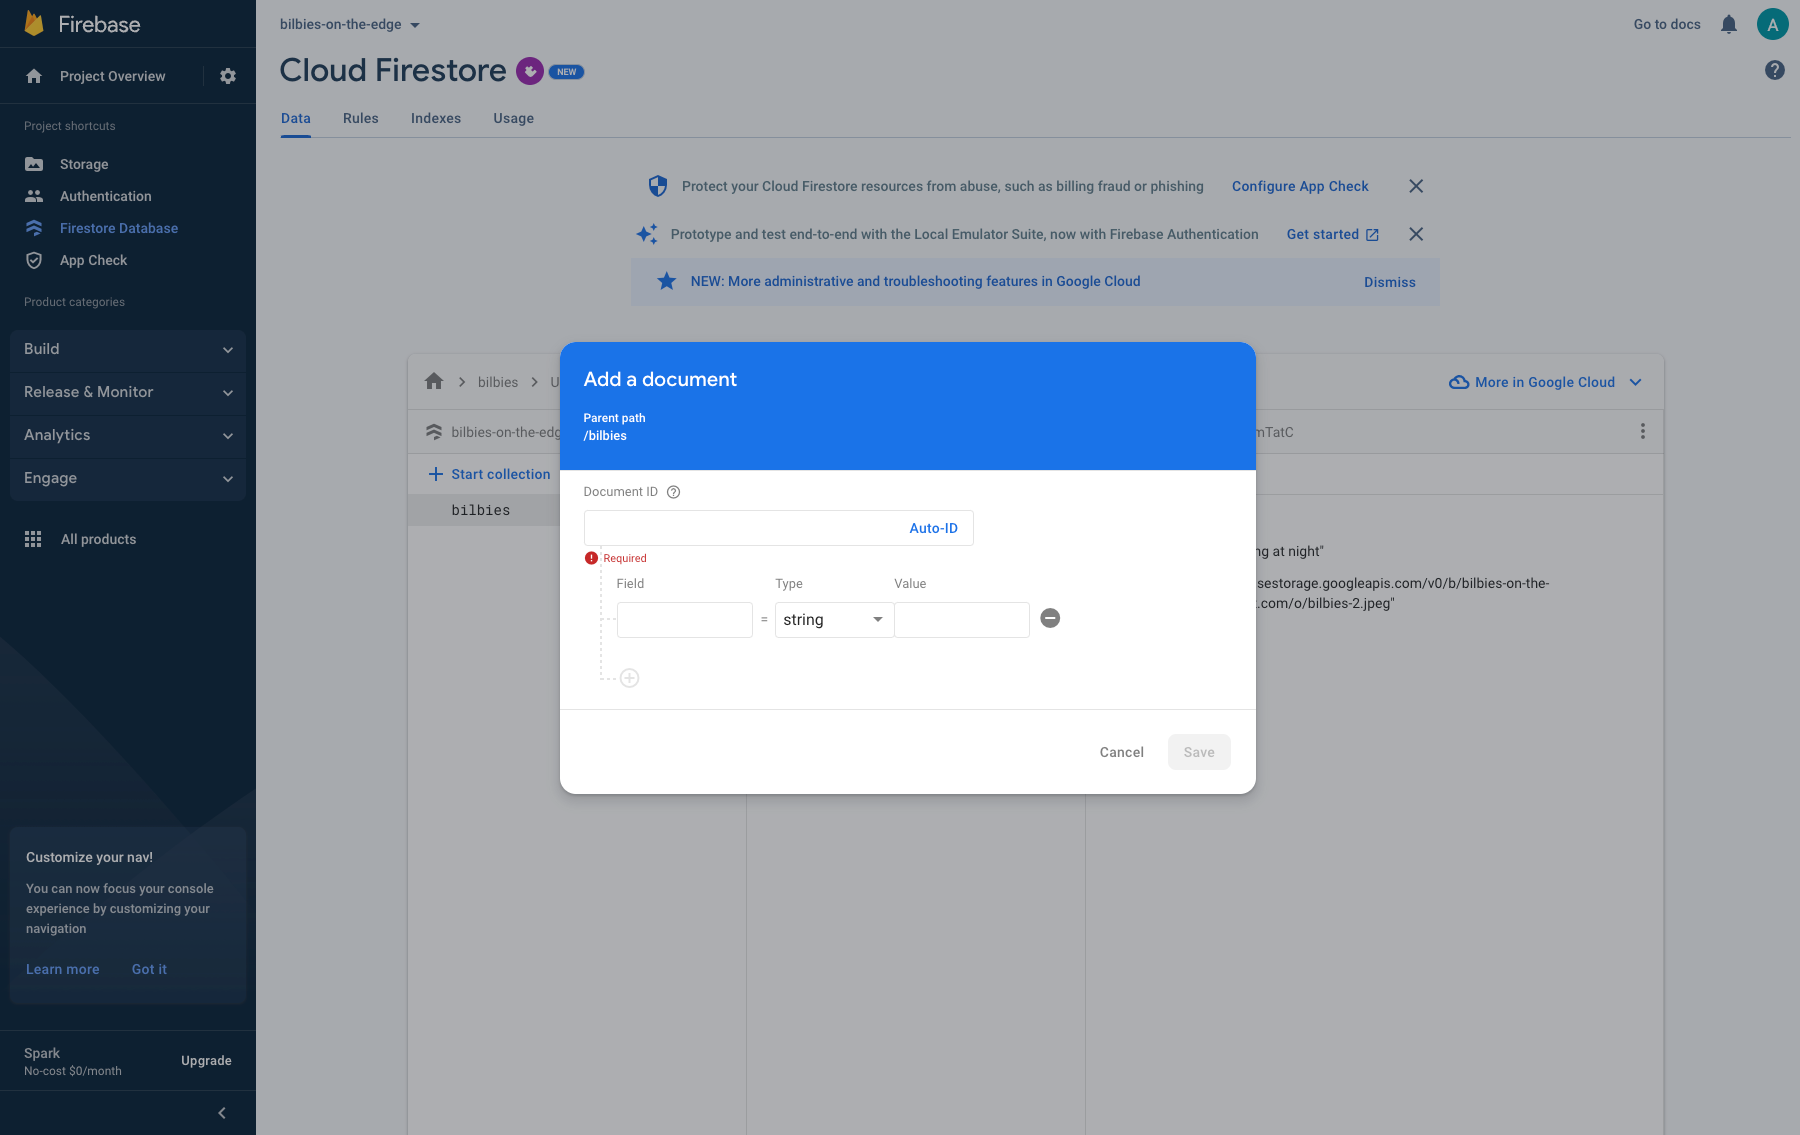
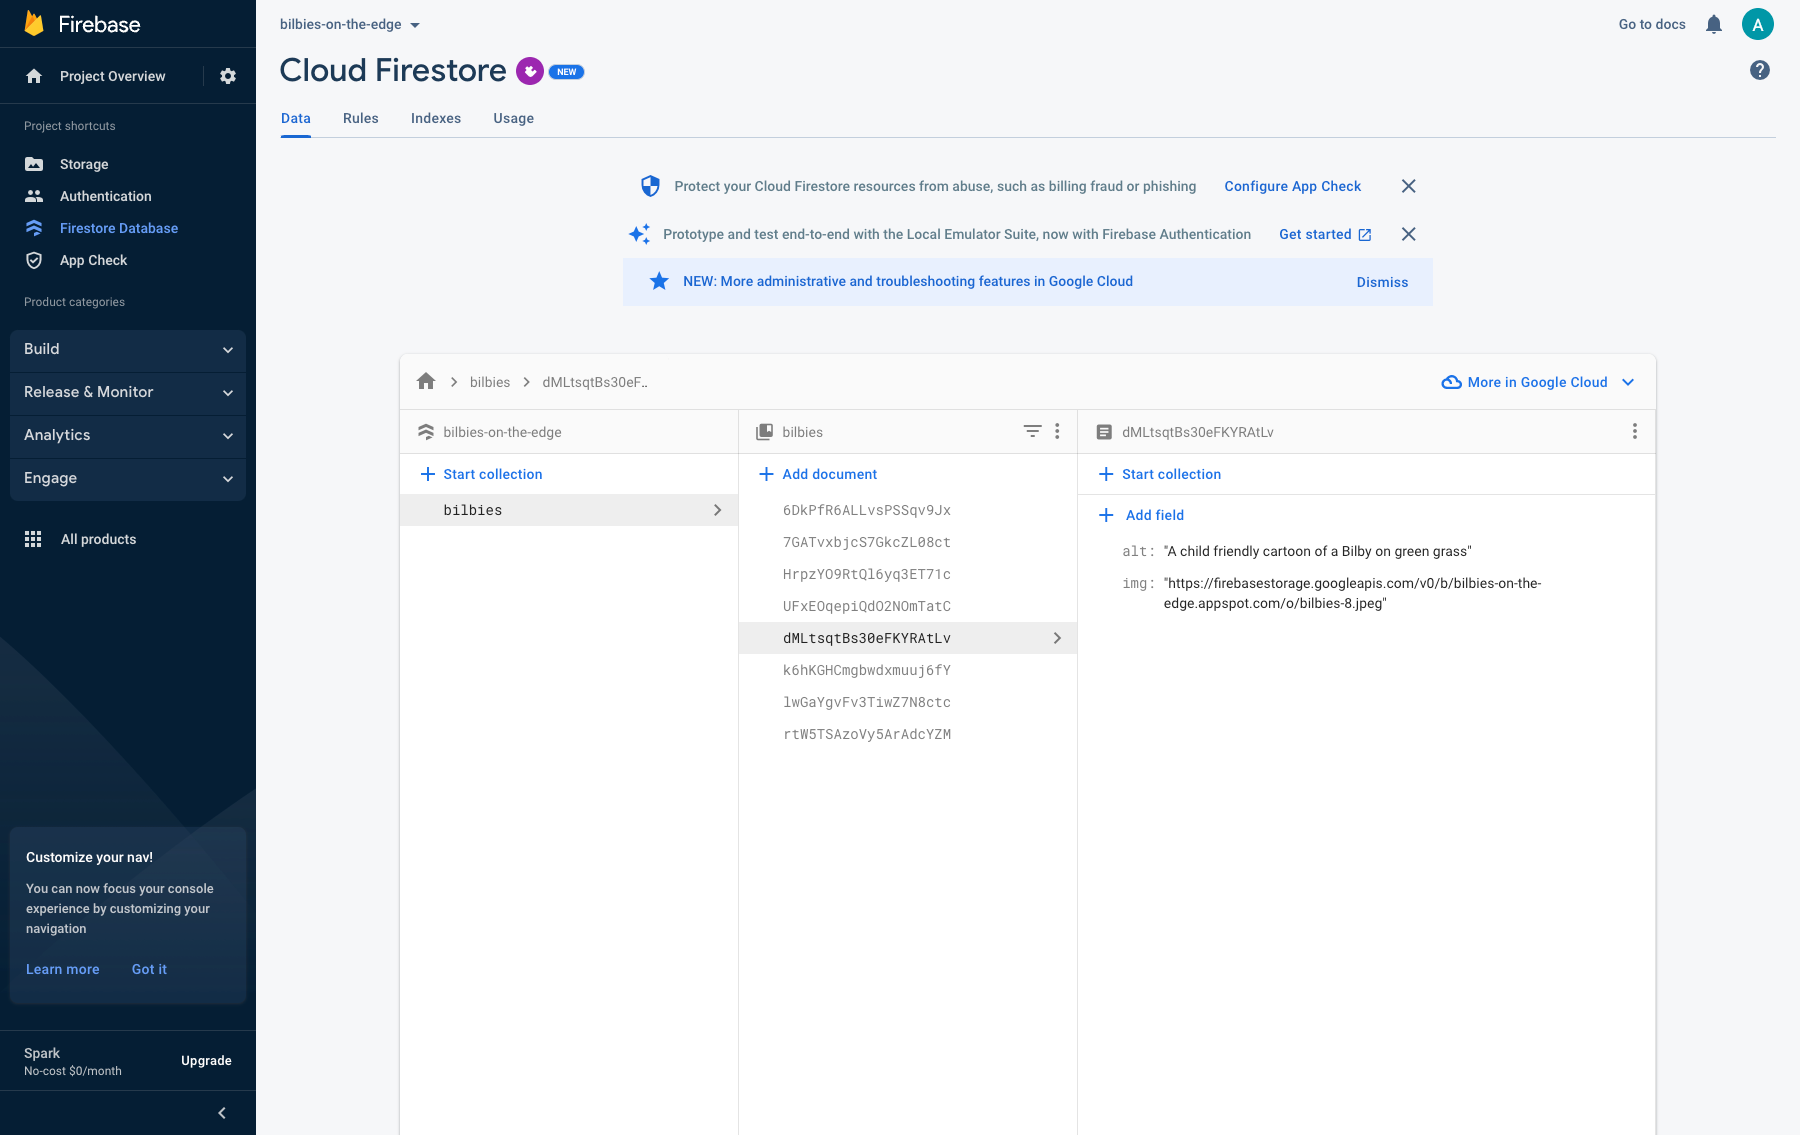
When adding each document to the collection, create an alt field and an img field of type string. Grab the image URL from the storage page and paste it into the img field.
Finally, add a suitable image description to the alt field. Repeat the process for each image, and you should have something that looks like this:
Now that we have completed that marathon of admin to set up Firebase, we can return to the fun coding part.
GET Request
Head back to your code editor, and let's get our GET request working correctly. Add the following imports to your index file.
// Deno library for processing the ENV file
import { config as loadEnv } from "https://deno.land/std/dotenv/mod.ts";

// Oak libraries
import { Application, Router } from "https://deno.land/x/oak@v10.6.0/mod.ts";

// Patches to make Firebase work in Deno
import "https://deno.land/x/xhr@0.2.0/mod.ts";
import { installGlobals } from "https://deno.land/x/virtualstorage@0.1.0/mod.ts";

// Firebase and Firestore functions
import { initializeApp } from "https://cdn.skypack.dev/firebase@9.9.1/app";
import {
  getFirestore,
  collection,
  getDocs,
} from "https://cdn.skypack.dev/firebase@9.9.1/firestore";

// Initialise the patches
installGlobals();
We have added a few things into the imports, so let's break it down, so you understand what we have done.
- First, we import a Deno library to help load env variables, which is where we store the config for Firebase
- Then we import Oak which we had before
- Next, we import two things to make Firebase work in Deno. Firebase does not use Fetch consistently but uses XMLHttpRequest, a legacy browser API. Deno will likely never implement XMLHttpRequest API, so we need this polyfill.
- The last imports are the functions we need to make Firebase and Firestore work
- Finally, we call the
installGlobalsfunction to init our polyfills
Next, we need to set up Firebase and pass in our config like so:
const port = 3000;
const app = new Application();

// Set up Firebase
await loadEnv({ export: true });
const firebaseApp = initializeApp({
  apiKey: Deno.env.get("API_KEY"),
  authDomain: Deno.env.get("AUTH_DOMAIN"),
  projectId: Deno.env.get("PROJECT_ID"),
  storageBucket: Deno.env.get("STORAGE_BUCKET"),
  messagingSenderId: Deno.env.get("MESSAGING_SENDER_ID"),
  appId: Deno.env.get("APP_ID"),
});

// Set up Firestore
const db = getFirestore(firebaseApp);
`
Here, we set up the server like before, then we load the env file. Using Deno.env.get(), we pass values into the init function for the Firebase app. Then we pass the firebaseApp variable into the getFirestore() function to get a connection to the database. We have not set up the env file yet so let's do that. Create a file called .env in the project and add the following keys and values from your config that you copied down earlier when setting up Firebase.
API_KEY=your-key
AUTH_DOMAIN=your-project-name.firebaseapp.com
PROJECT_ID=your-project-name
STORAGE_BUCKET=your-project-name.appspot.com
MESSAGING_SENDER_ID=your-messaging-sender-id
APP_ID=your-app-id
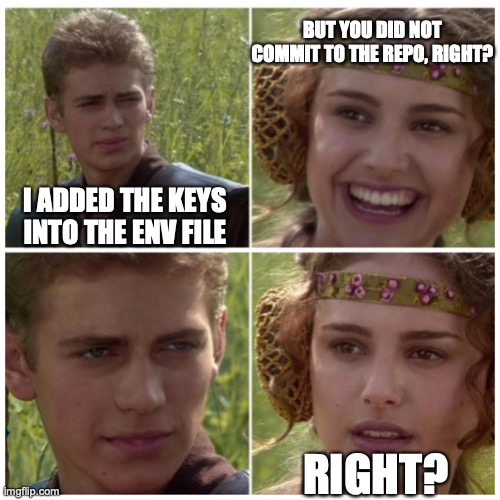
Rule number one is never commit env values to your repository unless you are one of those developers that like to live dangerously 😉. We can stop our env file from being saved by putting it in the git ignore. Add a .gitignore file and put .env inside the file; this will prevent your secrets from being sent to the repository.
Next, let's update the route to get the documents from the bilbies collection inside Firestore.
const router = new Router();

router.get("/bilbies", async (ctx) => {
  try {
    const colRef = collection(db, "bilbies");
    const { docs } = await getDocs(colRef);
    ctx.response.body = JSON.stringify({
      v: 1,
      data: docs.map((doc) => ({ _id: doc.id, ...doc.data() })),
    });
  } catch (err) {
    const status = 500;
    ctx.response.status = status;
    ctx.response.body = JSON.stringify({
      error: { message: err.message, status },
    });
  }
});
First, we add a ‘try and catch’ in case of an error. To get the documents from the database, we get a reference to the collection first. We then pass the collection ref into the function getDocs. After this, we can map through docs to get the id and data. We could build better handlers for errors in our API, but let's keep it simple in this example so you can understand what is going on. If you want to build on this example, I recommend adding a 404 and an error handler so you can throw errors from every route. Your index file should now look like this:
import { config as loadEnv } from "https://deno.land/std/dotenv/mod.ts";

import { Application, Router } from "https://deno.land/x/oak@v10.6.0/mod.ts";

import "https://deno.land/x/xhr@0.2.0/mod.ts";
import { installGlobals } from "https://deno.land/x/virtualstorage@0.1.0/mod.ts";

import { initializeApp } from "https://cdn.skypack.dev/firebase@9.9.1/app";
import {
  getFirestore,
  collection,
  getDocs,
} from "https://cdn.skypack.dev/firebase@9.9.1/firestore";

installGlobals();

const port = 3000;
const app = new Application();

await loadEnv({ export: true });
const firebaseApp = initializeApp({
  apiKey: Deno.env.get("API_KEY"),
  authDomain: Deno.env.get("AUTH_DOMAIN"),
  projectId: Deno.env.get("PROJECT_ID"),
  storageBucket: Deno.env.get("STORAGE_BUCKET"),
  messagingSenderId: Deno.env.get("MESSAGING_SENDER_ID"),
  appId: Deno.env.get("APP_ID"),
});

const db = getFirestore(firebaseApp);

const router = new Router();

router.get("/bilbies", async (ctx) => {
  try {
    const colRef = collection(db, "bilbies");
    const { docs } = await getDocs(colRef);
    ctx.response.body = JSON.stringify({
      v: 1,
      data: docs.map((doc) => ({ _id: doc.id, ...doc.data() })),
    });
  } catch (err) {
    ctx.response.status = 500;
    ctx.response.body = err.message;
  }
});

app.use(router.routes());
app.use(router.allowedMethods());

app.addEventListener("listen", () => {
  console.log(`Listening on localhost:${port}`);
});

await app.listen({ port });
Commit your code and push it to the repository, so it deploys using Deno Deploy. If you head back to your URL, you should see something like this:
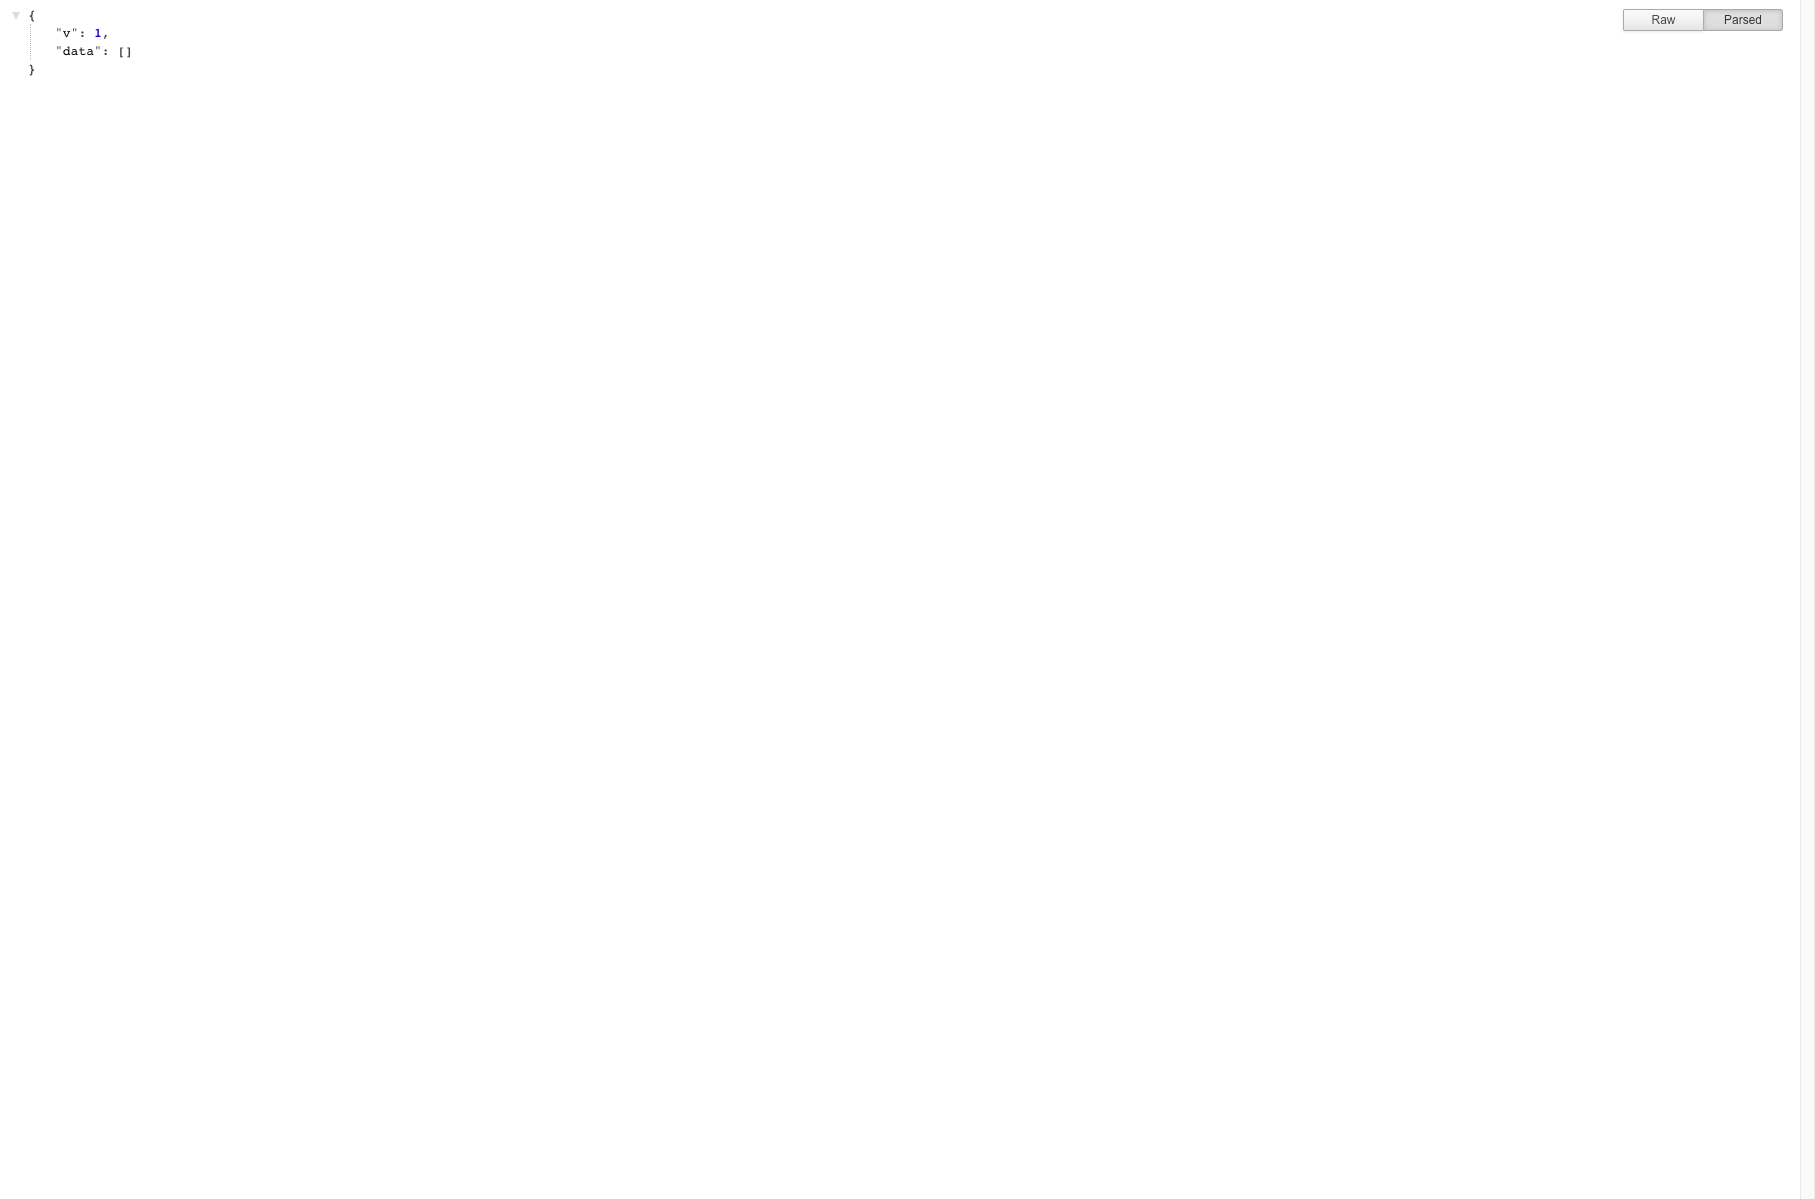
But wait, shouldn't the data be there? We need to add our env variables to Deno Deploy as well; otherwise, we will be passing in empty strings to the Firebase setup. Head to your project in Deno Deploy and click settings. Add all six key/values from your local env file here.
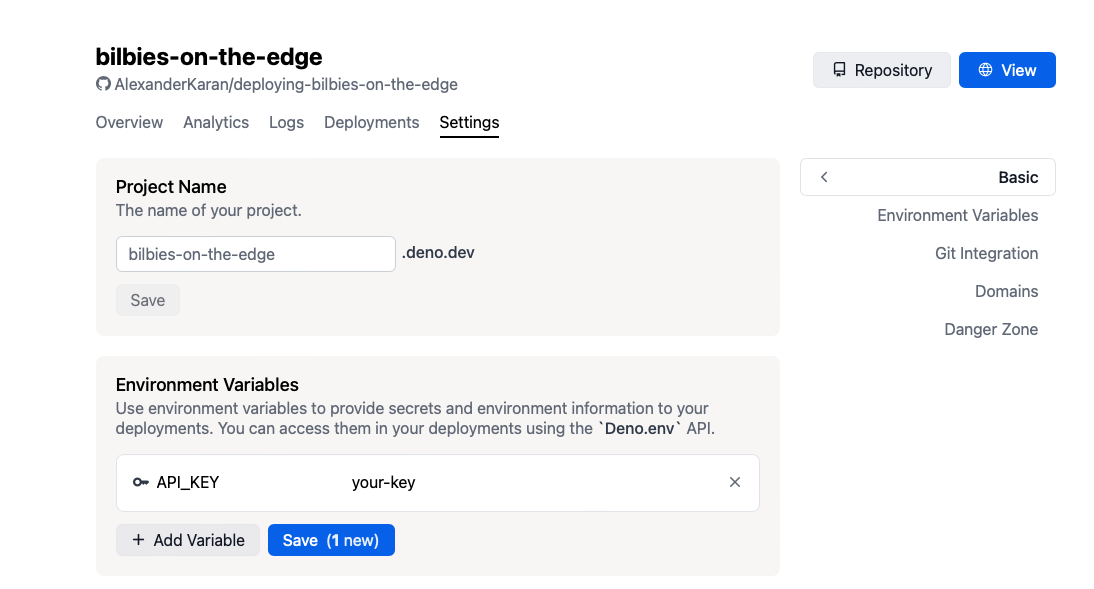
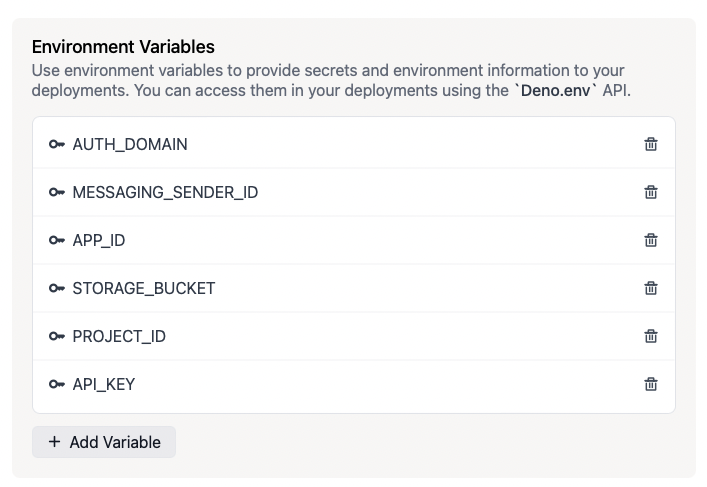
Click save, and it will trigger a redeploy. Your environment variables in Deno Deploy should now look like this:
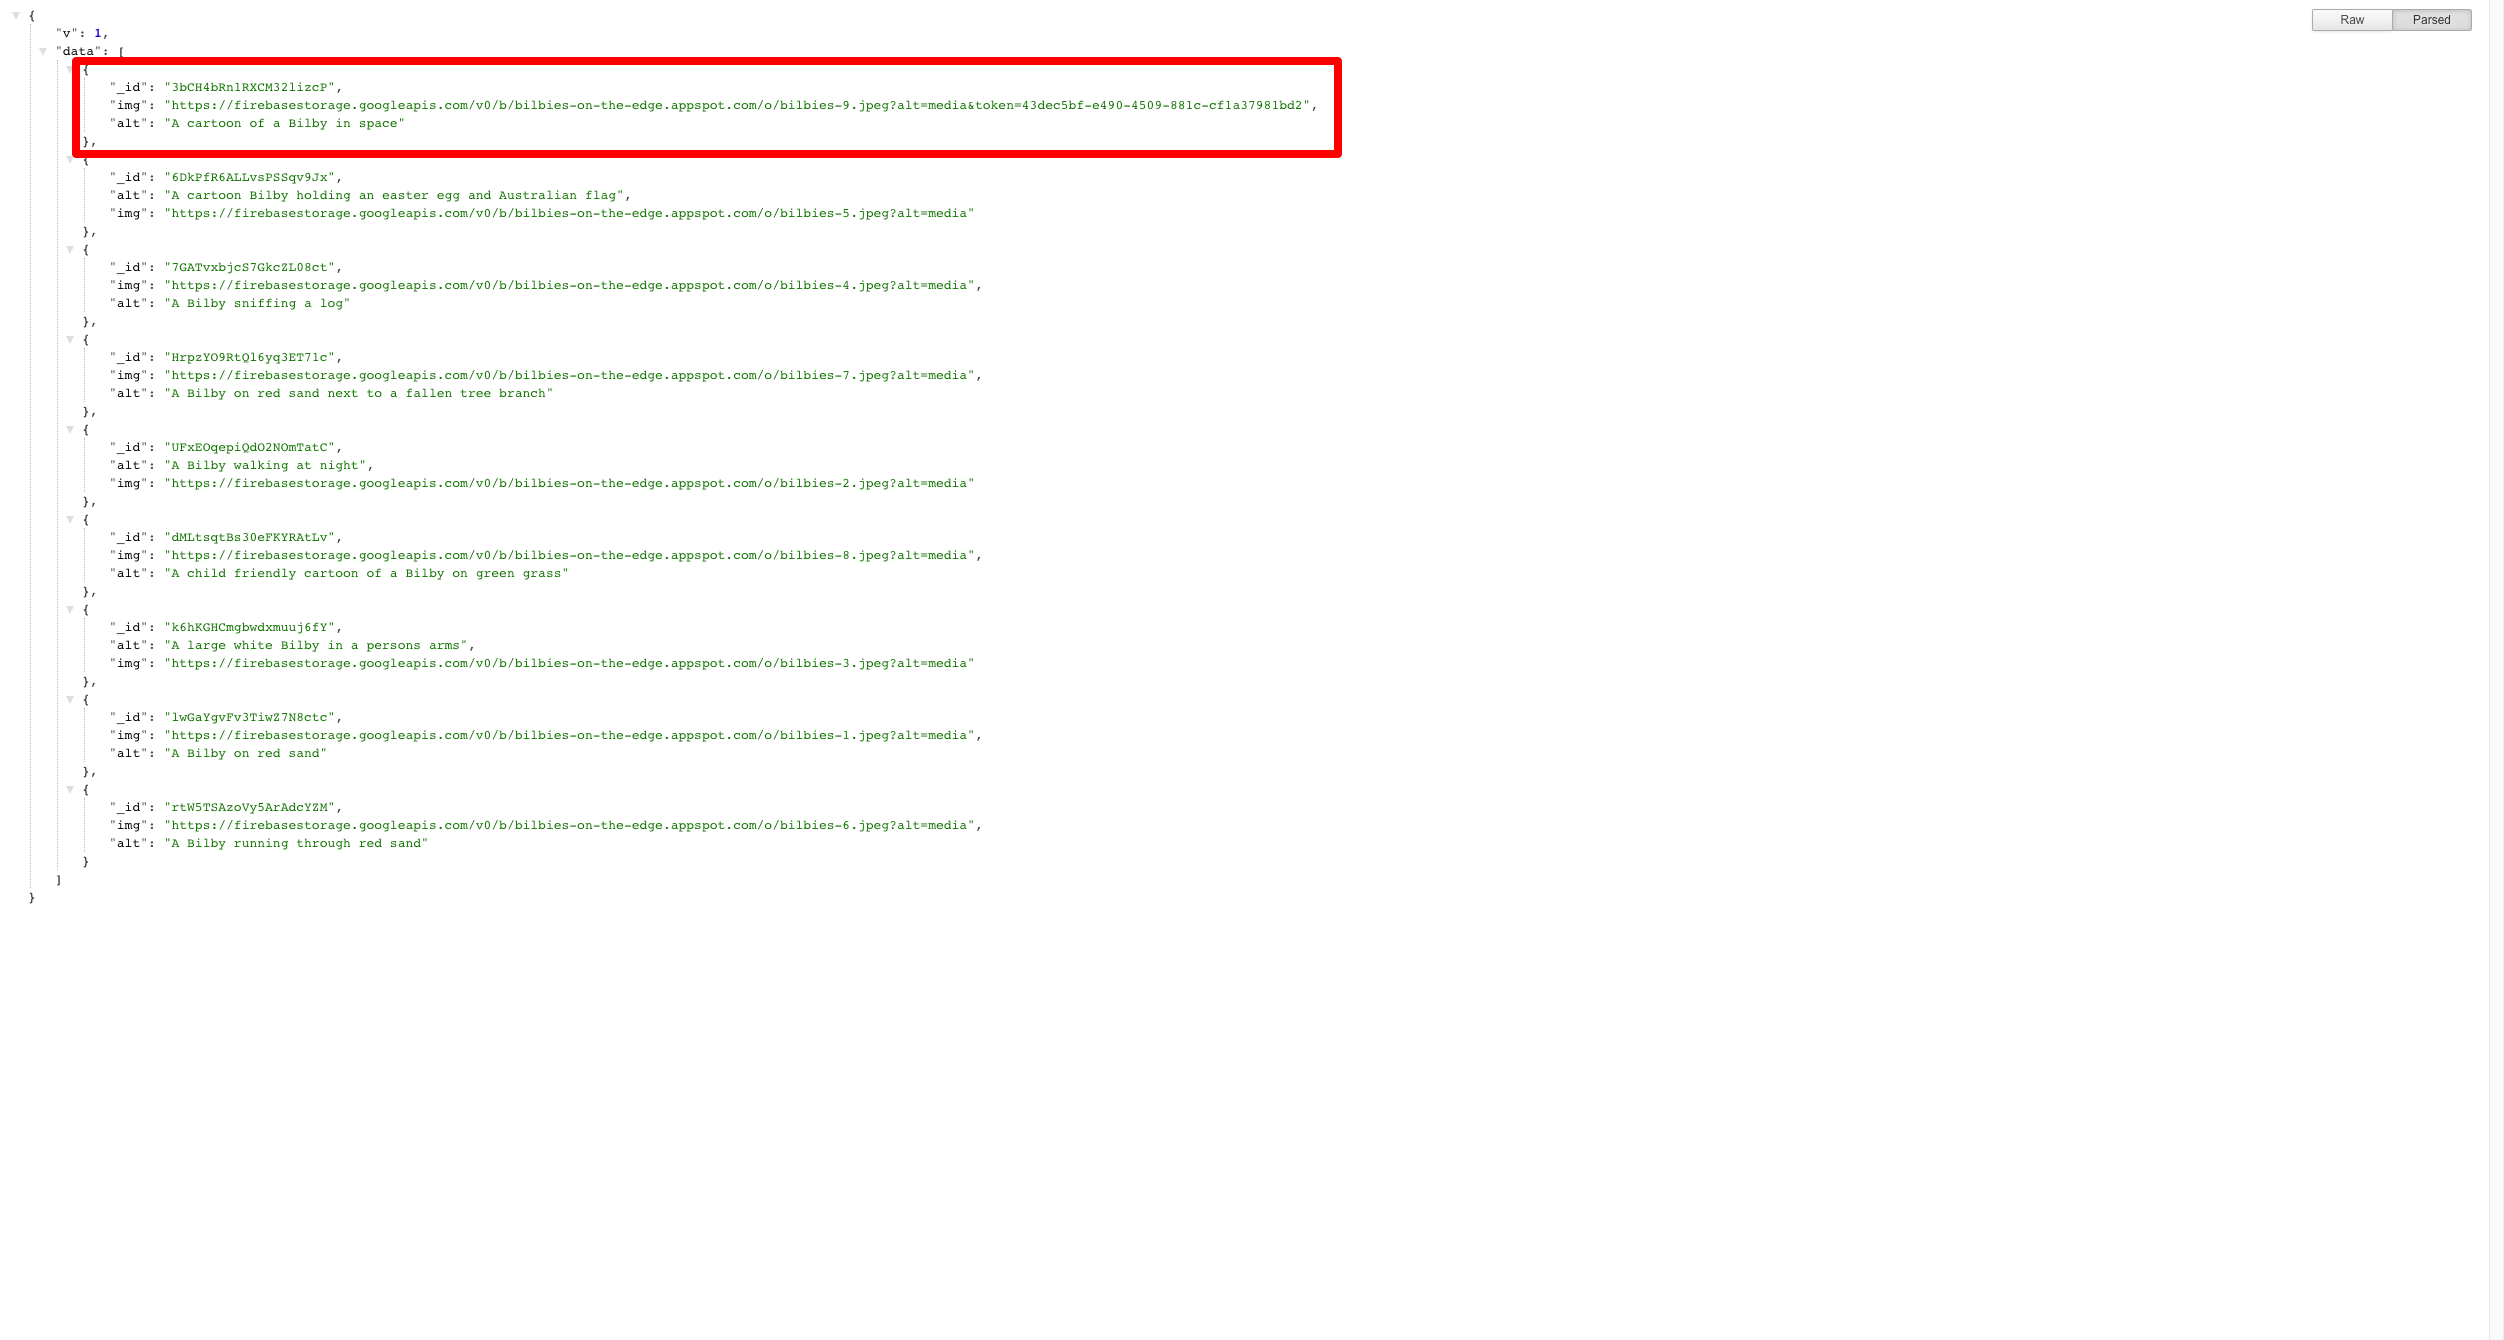
If we head back to the URL and click refresh, you should see a complete list of images. If it comes back blank, double-check your code and environmental variables.
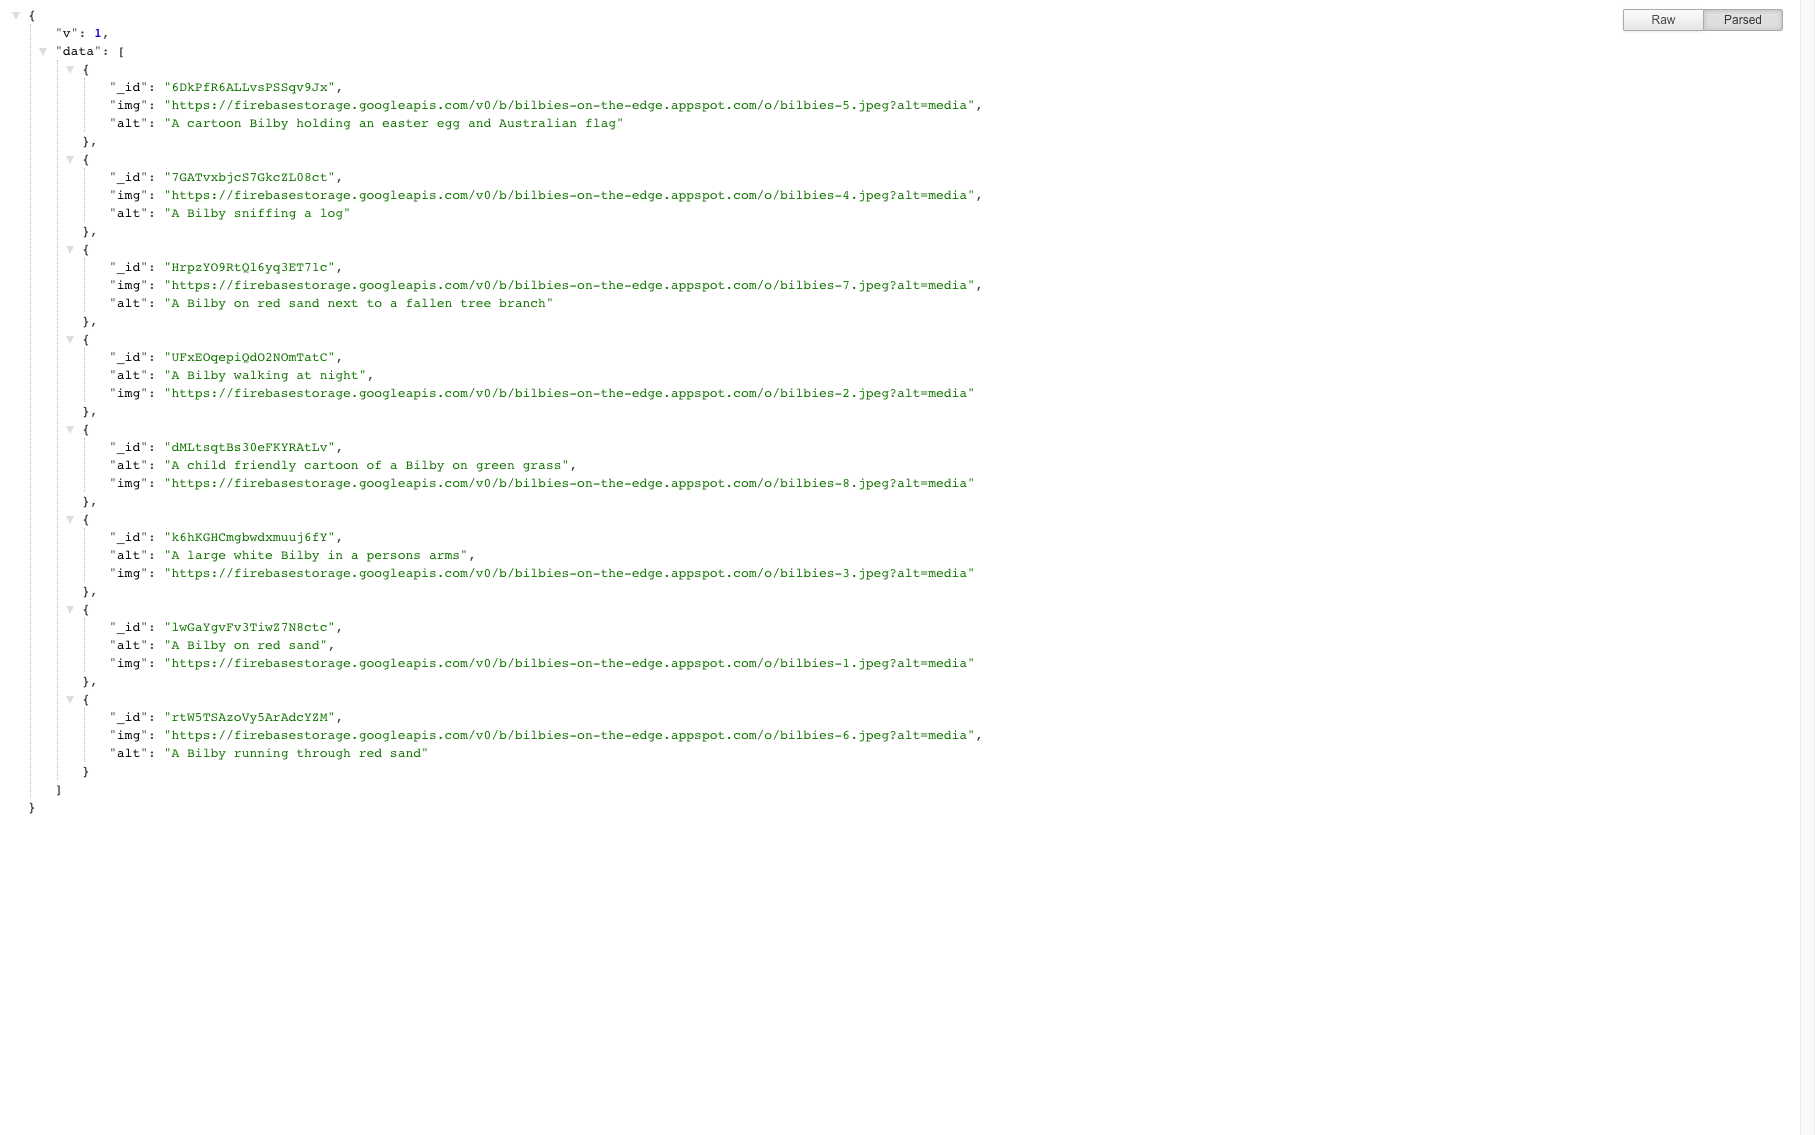
If you grab one of the URLs listed in the array, it should just load in your browser. You can try one of my image links here:
Now anyone can use our API endpoint to get a list of Bilbies for their websites, apps or API. Now let's add an upload endpoint so people can add to the collection.
POST Request
Add a second route after the GET request with a try and catch like before:
router.post("/bilbies", async (ctx) => {
  try {

    ctx.response.status = 200;
  } catch (err) {
    const status = 500;
    ctx.response.status = status;
    ctx.response.body = JSON.stringify({
      error: { message: err.message, status },
    });
  }
});
We will need to access a few more Firebase functions to access storage and update the database. Update your imports to match mine:
import { config as loadEnv } from "https://deno.land/std/dotenv/mod.ts";

import { Application, Router } from "https://deno.land/x/oak@v10.6.0/mod.ts";

import "https://deno.land/x/xhr@0.2.0/mod.ts";
import { installGlobals } from "https://deno.land/x/virtualstorage@0.1.0/mod.ts";

import { initializeApp } from "https://cdn.skypack.dev/firebase@9.9.1/app";
import {
  addDoc,
  getFirestore,
  collection,
  getDocs,
} from "https://cdn.skypack.dev/firebase@9.9.1/firestore";
import {
  getDownloadURL,
  uploadBytes,
  getStorage,
  ref,
} from "https://cdn.skypack.dev/firebase@9.9.1/storage";
Now let's add the code to make the upload function work. Inside the POST request, add the following two lines:
    const body = await ctx.request.body({
      type: "form-data"
    });
    const { fields, files } = await body.value.read({ maxSize: 2_000_000 });
The first line of code grabs the body and tells the request we’re expecting a body of type form-data. The second line reads the body and parses out the fields and files. We set the maxSize property to 2Mb, meaning any file up to 2Mb will be written to memory and not disk. Any uploaded file bigger than 2Mb will be written to disk. Files stored in memory can be accessed in the file.content property.
Before we process the image and add it to our storage, let's add some basic error checks to the endpoint. First, we should check for files attached to the request using the current file name.
    if (!files) {
      const status = 400;
      const message = "No image was provided";
      ctx.response.status = status;
      ctx.response.body = JSON.stringify({
        error: { message, status },
      });
      return;
    }

    const file = files[0];
    if (files.length > 1 || file.name !== "image") {
      const status = 400;
      const message =
        "Only one image is allowed and it must use the correct file key: image";
      ctx.response.status = status;
      ctx.response.body = JSON.stringify({
        error: { message, status },
      });
      return;
    }
Next, let's double-check it is not bigger than 2Mb and is available in the content value. Deno currently limits uploads to a 10Mb upload, but we don't want images larger than 2Mb. As a quick workaround, we can check that they are available in content for now. Blocking the upload of images above a specific size would be a much better approach.
    if (!file.content) {
      const status = 400;
      const message = "Image is larger than the 2mb limit";
      ctx.response.status = status;
      ctx.response.body = JSON.stringify({
        error: { message, status },
      });
      return;
    }
For the final check, let's ensure that an image of type JPEG was uploaded along with an alt description.
    if (file.contentType !== "image/jpeg" && file.contentType !== "image/jpg") {
      const status = 400;
      const message = "Only JPEG images are supported";
      ctx.response.status = status;
      ctx.response.body = JSON.stringify({
        error: { message, status },
      });
      return;
    }

    if (!fields.alt) {
      const status = 400;
      const message = "No alt description was provided";
      ctx.response.status = status;
      ctx.response.body = JSON.stringify({
        error: { message, status },
      });
      return;
    }
Finally, we need to save it in our storage and add the URL to our list.
    // First, we get a reference to our collection and count the docs in there to help with our image file name
    const colRef = collection(db, "bilbies");
    const { docs } = await getDocs(colRef);

    // Now we upload the file into the storage
    const storageRef = ref(storage, `bilbies-${docs.length + 1}.jpeg`);
    const snapshot = await uploadBytes(storageRef, file.content, {
      contentType: "image/jpeg",
    });

    // Once uploaded, we grab the URL to the image and save a link to the URL
    const url = await getDownloadURL(snapshot.ref);
    await addDoc(collection(db, "bilbies"), {
      alt: fields.alt,
      img: url,
    });
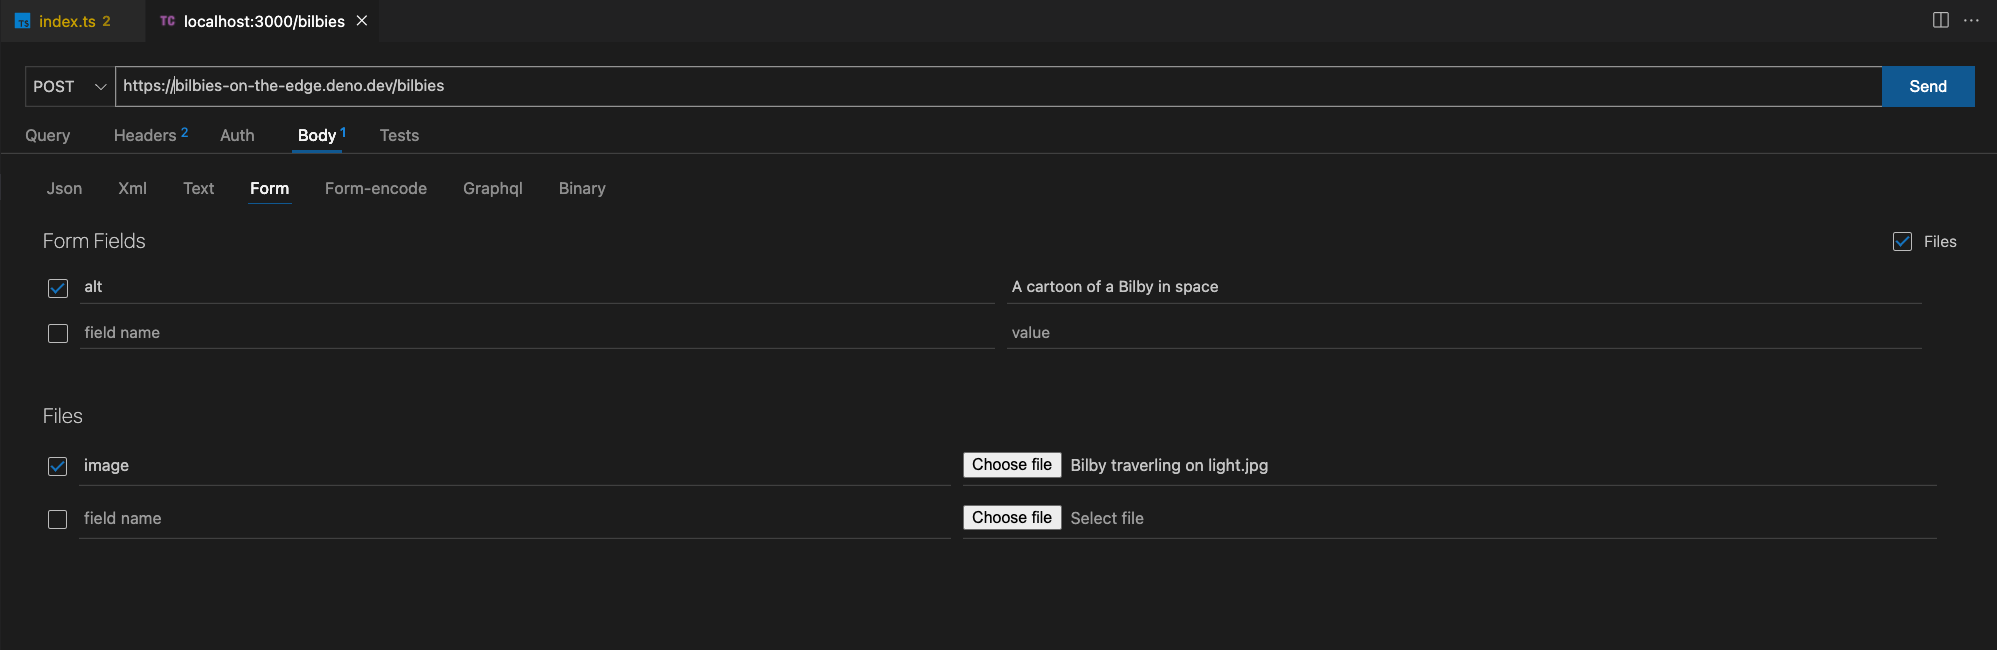
Now let's test it. I am using an HTTP client called Thunder Client, a VSCode extension, but you can use any client such as Postman.
Commit your code, so it rebuilds, and let's test it out. Here I set my URL, select POST request and type form for the body.
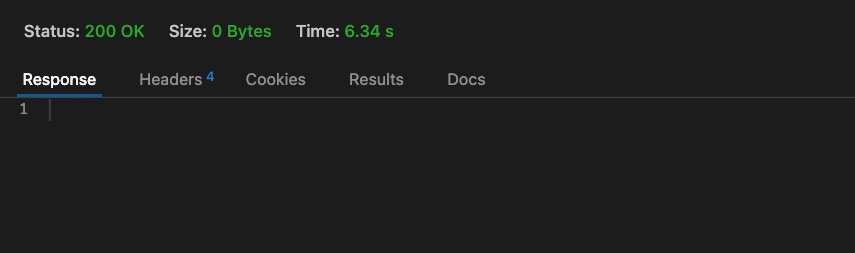
You should get back a 200:
If you make a GET request, you should see your new image.
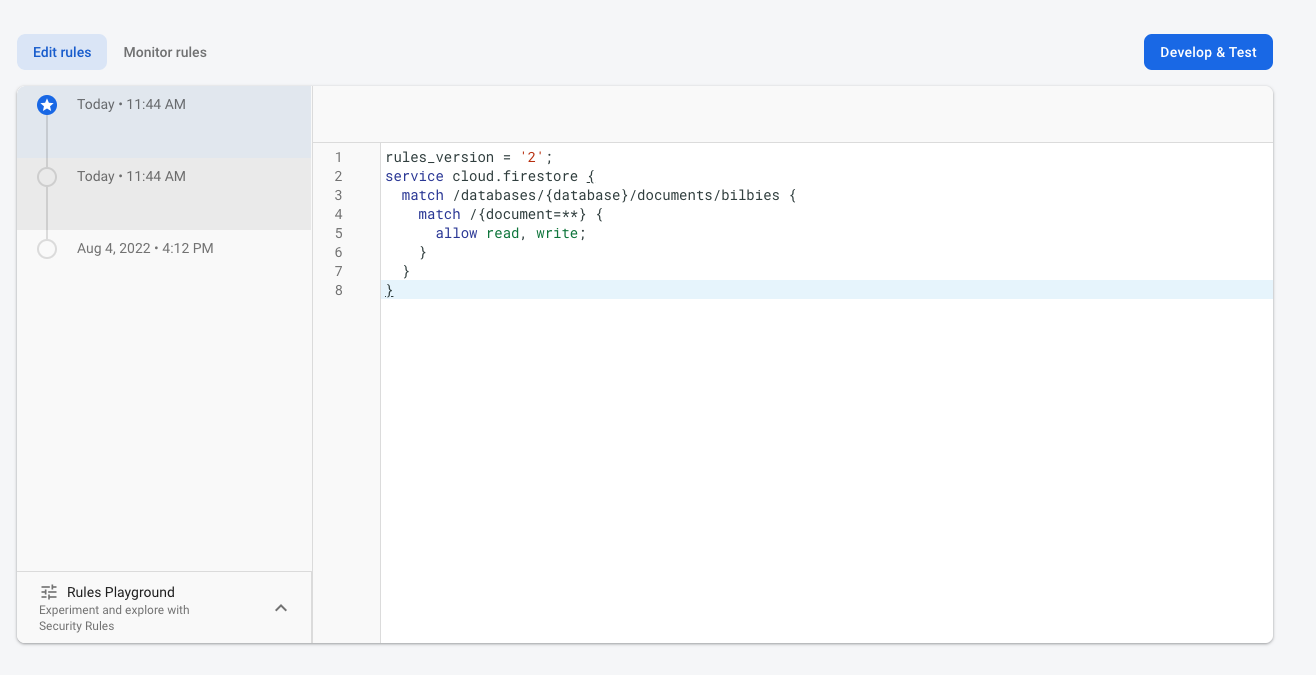
We now have a working API that gives anyone images of Bilbies and allows them to add to the collection. Before we wrap up, we should update our permission in Firebase. I am going to update my Firestore permissions only to allow access to the bilbies collection:
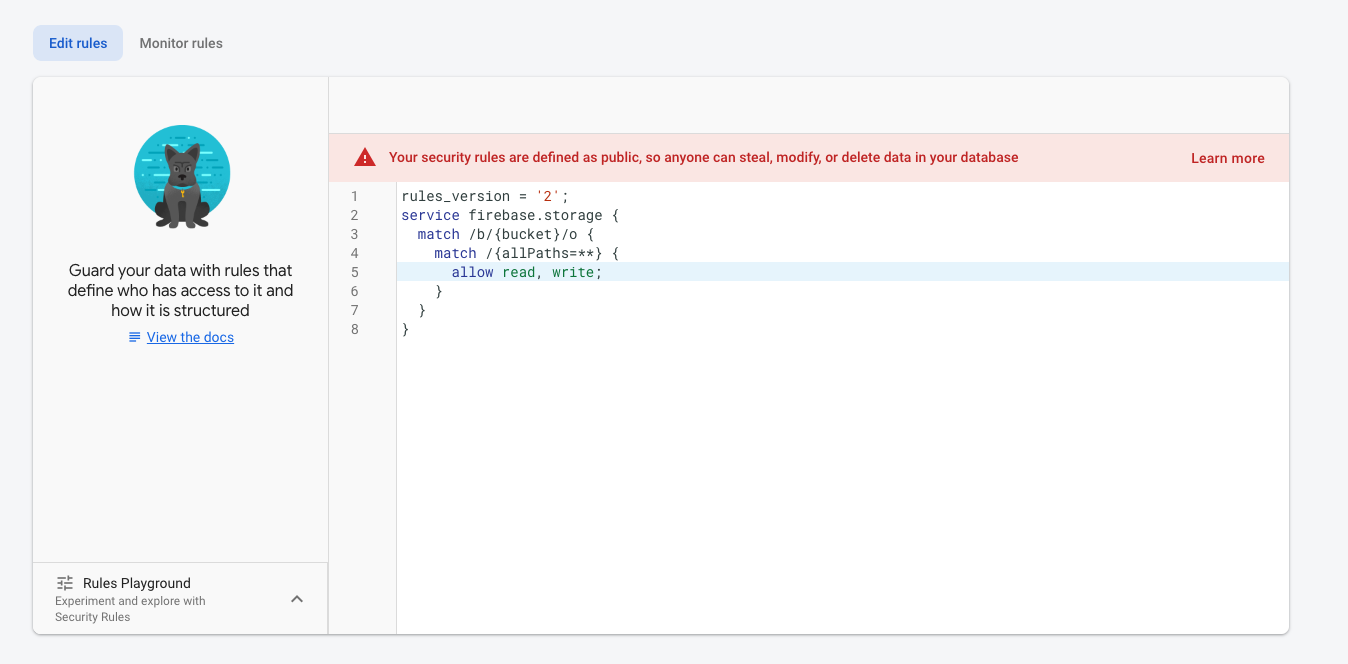
I will update the storage permission to allow all access for now. While people can get the image via the URL, they need an API key to upload or edit anything.
Wrapping up
If you enjoyed working with Deno, there is plenty more you can build onto this project to make it better, such as error handlers or even an API keys system for people to use the API. You can find the entire project on my Github page at the link below, or you can try out my API at this link. I will turn off my POST endpoint so the internet can't abuse it.
If you have any questions about the blog, you can reach me on Twitter @alexanderKaran_.